Juicing for Autoimmune Disease Recipes: Best Blends
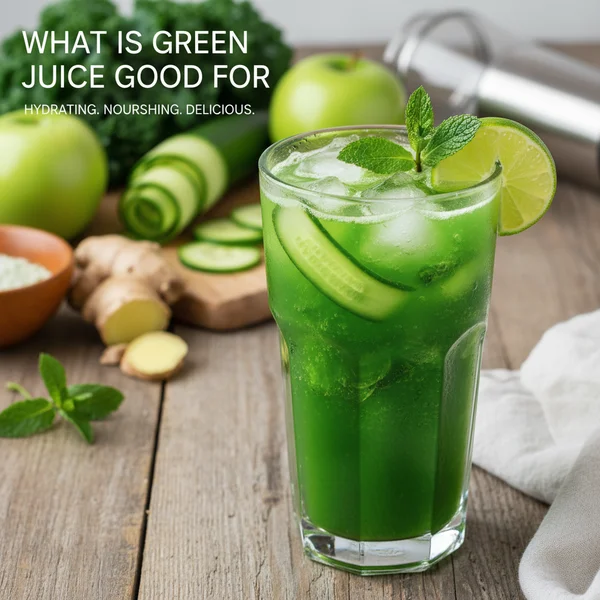
Managing the daily challenges of an overactive immune system requires a gentle, nourishing approach to nutrition. This vibrant, anti-inflammatory green elixir is a standout choice among juicing for autoimmune disease recipes because it prioritizes ingredients known to soothe systemic inflammation and support gut health. Whether you are navigating a flare-up or simply looking for a refreshing way to flood your body with bioavailable nutrients, this juice offers a delicious solution. It is the perfect morning ritual for those seeking to reduce oxidative stress while enjoying a crisp, clean flavor profile. You will love how the zing of ginger and turmeric balances the cooling cucumber, making this a drink that both your palate and your body will appreciate. This special blend is designed for anyone who wants to reclaim their vitality through the power of raw, plant-based nutrition.
- ⏱️ Prep Time: 10 minutes
- 🍳 Cook Time: 0 minutes
- 👥 Servings: 1 serving
- 📊 Difficulty: Easy
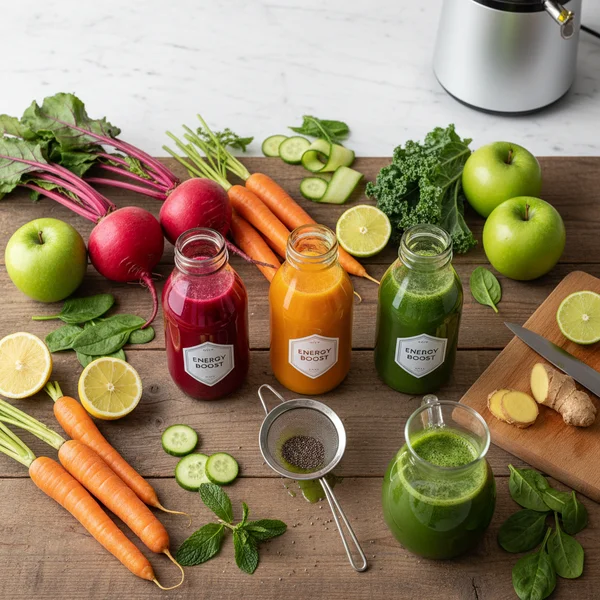
Ingredients
To ensure the highest quality of nutrients for this autoimmune-friendly recipe, try to source organic ingredients whenever possible to minimize exposure to pesticides. Gather the following items before you begin:
- 2 large stalks of organic celery (including leaves)
- 1 medium organic cucumber (unpeeled)
- 2 cups packed organic kale or spinach
- 1 small green apple (Granny Smith is best for lower sugar)
- 1-inch knob of fresh ginger root
- 1/2-inch knob of fresh turmeric root (or 1/2 teaspoon ground)
- 1/2 organic lemon (peeled)
- 1 small handful of fresh parsley
- A pinch of black pepper (to activate the turmeric)
Step-by-Step Instructions
1. The first step in preparing any of your juicing for autoimmune disease recipes is thorough cleaning. Since we are using raw ingredients, you want to ensure all dirt and potential pathogens are removed. Submerge your kale, celery, cucumber, and parsley in a bowl of cold water with a splash of apple cider vinegar. Let them soak for about five minutes, then rinse them under cold running water. Pat the greens dry with a clean kitchen towel to ensure they feed smoothly into your juicer without slipping.

2. Next, prepare your produce for the extraction process. While most high-powered juicers can handle whole fruits, cutting your ingredients into smaller, manageable pieces can prevent the machine from clogging and improve the yield. Slice the cucumber and apple into long spears. You do not need to remove the apple seeds or the cucumber skin, as the skin contains beneficial silica for skin and joint health. If you are using fresh ginger and turmeric, give them a quick scrub. There is no need to peel them, as the juicer will separate the fibrous skin from the potent juice inside.
3. Now it is time to start the juicing process. The order in which you add ingredients matters for maximum efficiency. Start by feeding the leafy greens, like kale and parsley, into the chute. Leafy greens are delicate and can sometimes get stuck; by following them immediately with high-moisture items like the cucumber or celery, you “wash” the green juice through the machine. This ensures that every drop of chlorophyll-rich liquid ends up in your glass rather than trapped in the pulp bin.
4. Continue by adding the ginger, turmeric, and lemon. These are your heavy hitters for fighting inflammation. The lemon not only adds a bright acidity that cuts through the earthiness of the greens but also provides vitamin C, which is essential for collagen synthesis—a vital process for those with autoimmune-related joint issues. As you feed these through, you will notice the juice turning a vibrant, slightly golden green color. The prep time spent here is minimal, but the nutritional payoff is immense.
5. Finish the extraction by juicing the remaining celery and the green apple. The apple provides just enough sweetness to make the juice palatable without causing a significant blood sugar spike, which is important because sugar can often trigger inflammatory responses. Once the last piece of produce has passed through the juicer, let the machine run for an additional thirty seconds to ensure all the liquid has been expressed from the pulp. Even though the cooking time is zero, the mechanical process of juicing requires a bit of patience to get the best results.
6. Once the juice is fully extracted, give it a gentle stir with a wooden or silicone spoon to incorporate all the different layers of nutrients. Pour the liquid into a chilled glass. For the final touch, add a tiny pinch of black pepper. While it might seem unusual for a juice, the piperine in black pepper significantly increases the bioavailability of curcumin found in the turmeric, ensuring your body actually absorbs the anti-inflammatory benefits. Serve immediately to enjoy the peak enzyme activity and refreshing taste of this homemade elixir.
To maximize the health benefits, use a masticating (cold-press) juicer if possible, as it preserves more enzymes by avoiding heat. If the taste is too “green” for you initially, add an extra half of a green apple or a few slices of pear to mellow the flavor until your palate adjusts. Always drink your juice on an empty stomach for the fastest absorption of nutrients.

Variations & Substitutions
When exploring juicing for autoimmune disease recipes, it is helpful to have a few variations to keep your routine interesting. If you find kale too bitter, you can easily substitute it with Swiss chard or romaine lettuce, which have a milder flavor profile but still offer plenty of minerals. For a more tropical twist that remains anti-inflammatory, replace the green apple with a half-cup of fresh pineapple; pineapple contains bromelain, an enzyme that aids digestion and reduces swelling. If you are following a specific protocol like the Autoimmune Protocol (AIP) and need to avoid certain spices, ensure you stick to the fresh roots rather than processed powders. You can also add a handful of fresh mint leaves for a refreshing, cooling effect that aids in soothing an upset stomach.
Storage & Make Ahead
For the best results, you should consume this juice immediately after preparation. Raw juice begins to oxidize as soon as it hits the air, which can deplete the delicate antioxidants. However, if you need to make it ahead of time, store the juice in an airtight glass mason jar, filling it all the way to the brim to minimize oxygen exposure. It will stay fresh in the refrigerator for up to 24 hours. If you notice any separation, simply give it a quick shake before drinking. Freezing is not recommended as it changes the cellular structure of the nutrients, but you can freeze the juice into ice cubes to add to future smoothies.
- Calories: 135 kcal
- Total Carbohydrates: 31g
- Dietary Fiber: 1g (liquid form)
- Sugars: 18g
- Vitamin C: 120% DV
- Vitamin K: 250% DV
❓ Frequently Asked Questions
1
How long does fresh juice last in the fridge?
Fresh juice is best consumed immediately to maximize the live enzymes and nutrient density. If you must store it, use an airtight glass container and keep it refrigerated for no more than 24 to 48 hours. Minimize the air gap at the top to reduce oxidation.
2
Can I make these juices ahead of time?
Yes, you can prep your ingredients by washing and chopping them the night before. However, for the best results in managing autoimmune symptoms, try to juice them fresh each morning. If you do juice ahead, use a masticating juicer as it preserves nutrients longer than centrifugal models.
3
What can I substitute for celery?
If you find celery too salty or strong, cucumber is the perfect hydrating substitute. It provides a high water content and a mild flavor while remaining low in sugar. Romaine lettuce or bok choy are also excellent base alternatives that offer great anti-inflammatory properties for autoimmune support.
4
How do I know when the juice is done?
The process is complete when the juicer has finished extracting liquid from the produce and the pulp coming out is relatively dry. Ensure you have processed all ingredients through the chute. The resulting liquid should be a vibrant, consistent color and free of large chunks or debris.
5
Can I freeze these juices for later?
Freezing is a great way to preserve juice if you make a large batch. Use freezer-safe glass jars and leave at least an inch of space for expansion. Thaw in the refrigerator overnight before drinking. While slightly less potent than fresh, it remains a healthy, convenient option.