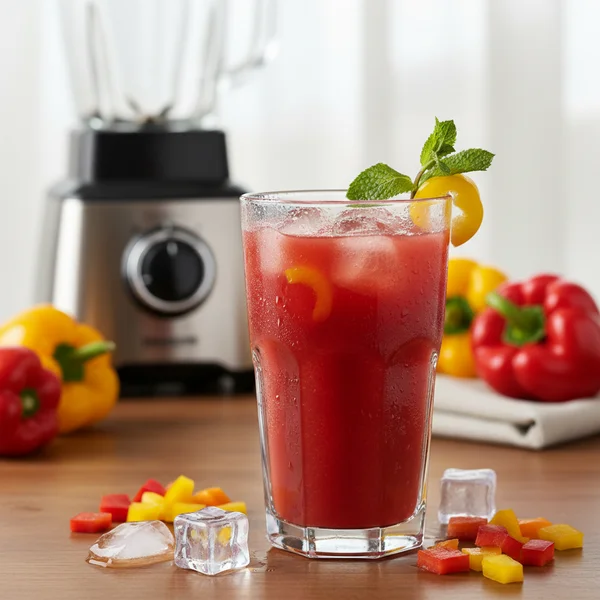
Bell Pepper Juice Recipe: Refreshing & Healthy
Imagine a beverage that captures the vibrant essence of a summer garden in every single sip. This bell pepper juice recipe is an absolute revelation for those seeking a unique, hydrating, and visually stunning drink that defies the standard expectations of vegetable juices. It offers a sophisticated balance of natural sweetness and earthy undertones, resulting in a crisp, refreshing profile that surprises the palate with its clean finish. Whether you are looking for a morning pick-me-up or a post-workout recovery drink, this bright crimson elixir is packed with vitamin C and essential nutrients. It is the perfect choice for health enthusiasts and adventurous foodies alike who want to explore beyond the standard green juices.
- ⏱️ Prep Time: 10 minutes
- 🍳 Cook Time: 0 minutes
- 👥 Servings: 2 servings
- 📊 Difficulty: Easy
Ingredients Section
The beauty of this bell pepper juice recipe lies in the quality of the produce. Because there is no cooking involved, every ingredient must be fresh and at its peak ripeness to ensure a flavorful result.
The Base Components:
- 3 large red bell peppers (ensure they are firm, glossy, and heavy for their size)
- 1.5 cups cold filtered water (or coconut water for added electrolytes)
- 1 medium cucumber, peeled and roughly chopped
The Flavor Enhancers:
- 1 tablespoon fresh lemon juice or lime juice
- 1/2 inch piece of fresh ginger, peeled and bruised
- 1 teaspoon organic honey or agave nectar (optional, depending on the sweetness of the peppers)
- A tiny pinch of sea salt to brighten the botanical notes
For Serving and Texture:
- 2 cups of cracked ice or frozen water cubes
- Fresh mint sprigs for an aromatic garnish
- Thin slices of red pepper or lemon rounds for decoration
Step-By-Step Instructions
Step 1: Selecting and Preparing Your Produce
The journey to a perfect bell pepper juice begins at the market. Choose red, orange, or yellow peppers as they contain the highest sugar content and provide a beautiful, appetizing color. Wash your peppers thoroughly under cold running water to remove any debris or wax. Pat them dry with a clean kitchen towel. Using a sharp chef’s knife, cut the peppers in half and carefully remove the green stem, the internal white membranes, and all the seeds. The seeds and pith can introduce a bitter flavor that will detract from the refreshing sweetness of the final beverage, so take your time with this preparation.
Step 2: Chopping for Maximum Efficiency
Once your peppers are cleaned and deseeded, chop them into uniform chunks roughly one to two inches in size. Do the same for your cucumber and ginger. While a high-speed blender can handle large pieces, smaller chunks allow for a more consistent blend and prevent the motor from overheating, which can slightly warm the juice and alter its delicate flavor profile. Consistency in size ensures that every piece of the vegetable is processed at the same rate.
Step 3: Loading the Blender
Place the chopped bell peppers, cucumber, and ginger into the jar of your blender. It is best to add the liquid component—your filtered water or coconut water—after the vegetables. Adding the liquid last helps the solid ingredients settle toward the blades. If you are using a sweetener like honey or agave, drizzle it directly over the vegetables now. This allows the sweetener to integrate fully during the high-speed processing phase.
Step 4: The Blending Process
Secure the lid of your blender tightly. Start on the lowest speed setting to break down the large chunks of pepper and cucumber. Gradually increase the speed to high and blend for approximately 60 to 90 seconds. You are looking for a completely smooth, pulverized consistency. The mixture should look like a vibrant, frothy puree. The high speed of the blender helps to emulsify the natural oils in the pepper skin, creating a slightly creamy mouthfeel that is incredibly satisfying.
Step 5: Straining for a Refined Texture
While some people enjoy the fiber of a whole vegetable drink, a true juice should be light and clear. Place a fine-mesh sieve or a nut milk bag over a large glass pitcher. Pour the blended mixture through the strainer. Use a silicone spatula to gently press the pulp against the mesh, extracting as much liquid as possible. If you are using a nut milk bag, squeeze it firmly with clean hands until the remaining pulp is almost dry. This step ensures your drink is hydrating and smooth rather than thick like a smoothie.
Step 6: Balancing the Flavors
Taste your extracted juice. Depending on the season and the specific peppers used, you may want to adjust the acidity or sweetness. Stir in the fresh lemon juice and a tiny pinch of sea salt. The salt does not make the drink salty; rather, it acts as a flavor bridge that connects the sweetness of the pepper with the zing of the ginger. Stir gently with a long spoon to ensure the flavors are well-distributed.
Step 7: Chilling the Beverage
Bell pepper juice is best enjoyed when it is ice-cold. You can place the pitcher in the refrigerator for 30 minutes, or for an immediate result, prepare your serving glasses. Fill two tall glasses halfway with cracked ice or frozen cubes. The ice helps to dilute the intensity of the juice slightly, making it even more refreshing and easy to drink.
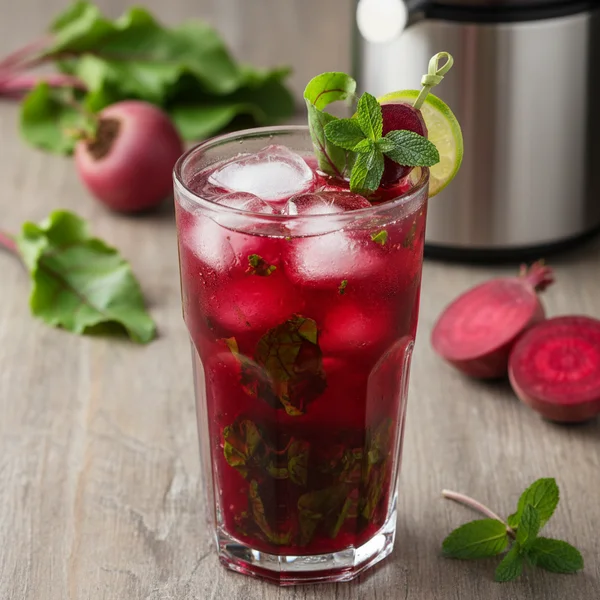
Step 8: Final Garnish and Presentation
Pour the chilled juice over the ice in your prepared glasses. To elevate the experience, add a garnish of fresh mint leaves. The aroma of the mint pairs beautifully with the earthy scent of the bell peppers. Add a thin slice of lemon or a small strip of red pepper to the rim of the glass for a professional, cafe-style look. Serve immediately while the juice is at its peak freshness.
To prevent the juice from oxidizing and losing its vibrant color, add the lemon juice immediately after blending. If you want a frothier texture, blend in a few pieces of frozen pineapple; it adds a tropical twist and a velvety foam to the top of your drink. For those who prefer a completely pulp-free experience, double-strain the juice through a cheesecloth. Always serve this beverage chilled, as room temperature vegetable juice can taste overly savory.

Variations & Substitutions
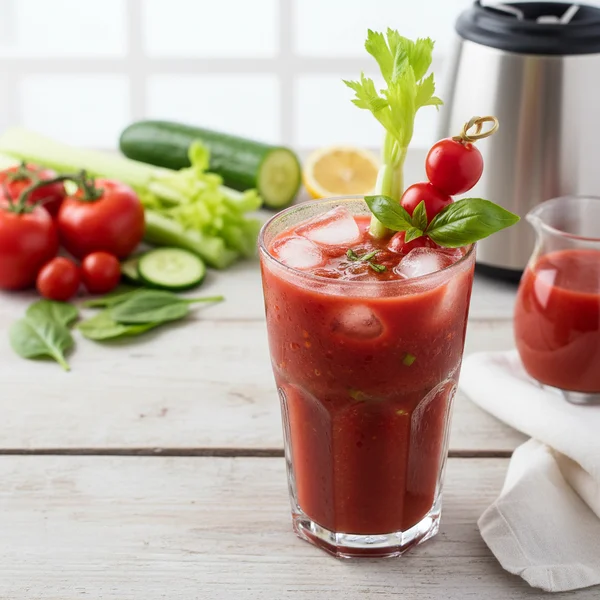
This bell pepper juice recipe is highly adaptable. If you prefer a more savory profile, replace the red peppers with green bell peppers and add a pinch of black pepper and a dash of Worcestershire sauce for a “Garden Mary” style drink. For a spicy kick, blend in a small slice of deseeded jalapeno; the heat works wonderfully with the sweetness of the red pepper. If you are looking for a more fruit-forward hydrating beverage, substitute the cucumber with one cup of fresh watermelon or a peeled orange. For those following a strictly low-carb or keto diet, omit the honey and use a few drops of liquid stevia or simply rely on the natural sugars of the peppers.
Storage & Make Ahead
Fresh vegetable juice is always best consumed within twenty minutes of preparation to maximize the nutrient density and flavor. However, if you have leftovers, store the juice in an airtight glass mason jar in the refrigerator. It will remain delicious for up to 24 hours. You may notice some separation, which is completely natural; simply give the jar a vigorous shake before pouring it over fresh ice. For a convenient make-ahead option, you can pour the juice into silicone ice cube trays and keep them frozen. These frozen juice cubes can be popped into a blender for a quick slushie or used to chill future batches of juice without diluting the flavor.
Nutrition Info
- Calories: 65 kcal
- Vitamin C: 180% DV
- Vitamin A: 45% DV
- Carbohydrates: 14g
- Fiber: 3g (if unstrained)
- Protein: 2g
Note: Nutritional values are estimates based on standard red bell peppers and may vary with substitutions.

❓ Frequently Asked Questions
1
How long does bell pepper juice last in fridge?
Freshly made bell pepper juice is best consumed immediately to maximize its nutritional value. However, you can store it in an airtight glass container in the refrigerator for up to 24 hours. Shake well before drinking as natural separation will occur while it sits.
2
Can I make bell pepper juice ahead of time?
While you can make it a day ahead, the flavor and vitamin C content are highest right after blending. If you must prepare it in advance, keep it chilled and add a squeeze of lemon juice to help preserve the vibrant color and fresh taste.
3
What can I substitute for a blender?
If you do not have a blender, you can use a dedicated centrifugal or cold-press juicer. Using a juicer eliminates the need for straining the pulp manually, but a blender is a fantastic alternative for those who want to control the thickness and fiber content.
4
How do I know when bell pepper juice is done?
The juice is ready when the peppers are completely pulverized and the liquid is vibrant and uniform. If using a blender, ensure there are no large chunks remaining. After straining, the result should be a thin, refreshing liquid that is easy to sip over ice.
5
Can I freeze bell pepper juice?
Yes, you can freeze bell pepper juice in silicone ice cube trays for up to three months. These frozen cubes are perfect for dropping into smoothies or using as a base for soups and sauces, though the texture may change slightly if thawed to drink alone.