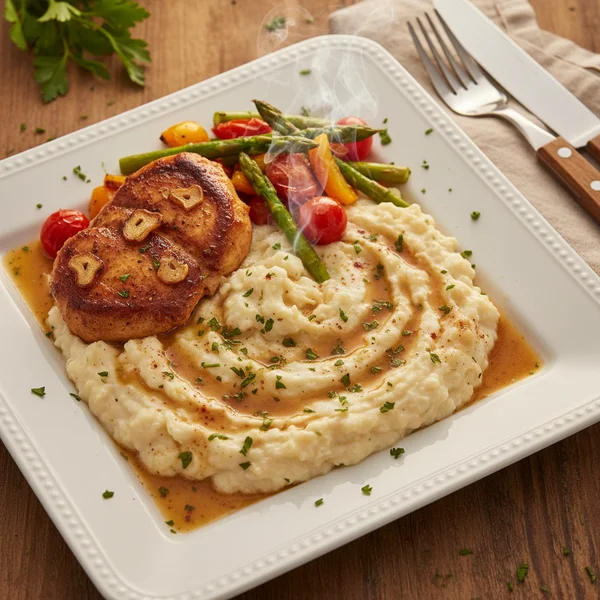
Roasted Garlic Cauliflower Mash: Creamy & Healthy
Imagine a side dish so creamy, flavorful, and aromatic that it threatens to steal the spotlight from your main course. This roasted garlic cauliflower mash is exactly that—a culinary transformation that turns a humble vegetable into a gourmet masterpiece. Whether you are hosting a festive holiday dinner, preparing a cozy weeknight meal for your family, or looking for a comforting, low-carb alternative to traditional mashed potatoes, this recipe delivers on every front. It is perfect for those who want the indulgence of a rich, buttery mash without the heavy starch. You will fall in love with the way the deep, caramelized notes of roasted garlic blend seamlessly with the nutty undertones of steamed cauliflower.
- ⏱️ Prep Time: 15 minutes
- 🍳 Cook Time: 35 minutes
- 👥 Servings: 4 servings
- 📊 Difficulty: Easy
Ingredients for the Ultimate Roasted Garlic Cauliflower Mash
To achieve the perfect texture and depth of flavor, sourcing fresh ingredients is key. This recipe relies on high-quality fats and aromatic seasoning to elevate the cauliflower to a professional level.
- Cauliflower: 2 large heads, leaves removed and cut into uniform florets (approximately 8-10 cups).
- Garlic: 2 whole heads of garlic (the roasting process mellows the bite, so don’t be afraid of the quantity).
- Healthy Fats: 4 tablespoons of unsalted grass-fed butter or ghee; plus 1 tablespoon of extra virgin olive oil for roasting.
- Creaminess: 1/4 cup of heavy cream, full-fat Greek yogurt, or sour cream (use coconut cream for a dairy-free version).
- Cheese (Optional): 1/3 cup of freshly grated Parmesan cheese for a savory, salty kick.
- Seasoning: 1 teaspoon of sea salt, 1/2 teaspoon of freshly cracked black pepper, and 1/2 teaspoon of onion powder.
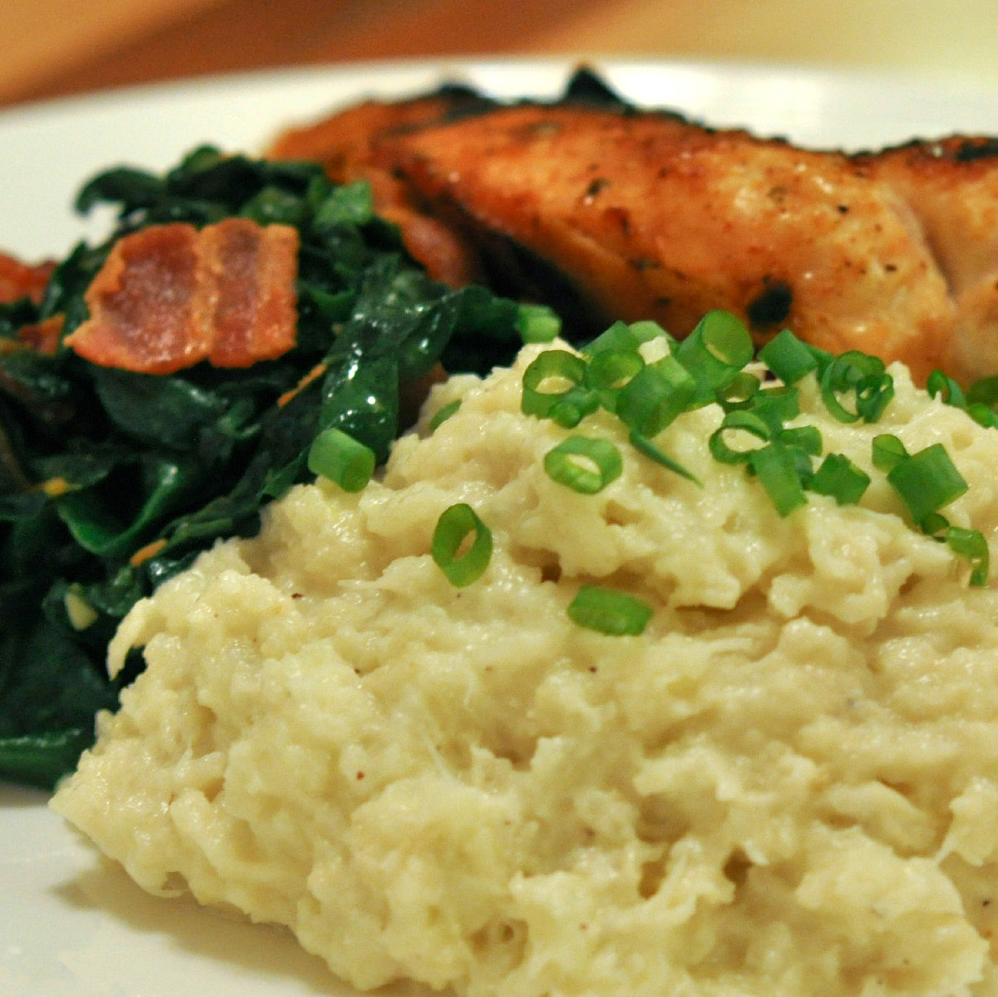
- Garnish: 2 tablespoons of fresh chives or flat-leaf parsley, finely chopped.
Step-By-Step Instructions
Following these steps carefully will ensure your roasted garlic cauliflower mash has the ideal consistency—smooth, velvety, and never watery.
Step 1: Roast the Garlic
Preheat your oven to 400°F (200°C). Prepare the garlic by slicing off the very top of each garlic head to expose the cloves. Place the heads on a small piece of aluminum foil and drizzle with one tablespoon of olive oil. Ensure the oil seeps into the cloves. Fold the foil to create a sealed pouch. Place this in the oven and let the cooking time reach about 30 to 35 minutes. You are looking for the garlic to become soft, fragrant, and deep golden brown.
Step 2: Prepare the Cauliflower
While the garlic is roasting, wash your cauliflower and break it down into small, even florets. Smaller pieces cook faster and more evenly. Avoid using the thickest parts of the stems if you want a smoother finish, as they can be fibrous. Place the florets into a large steamer basket over a pot of boiling water. Cover and steam for 12 to 15 minutes. The cauliflower must be “fork-tender,” meaning a fork should slide in and out with zero resistance.
Step 3: The Resting Time and Garlic Extraction
Once the garlic is finished roasting, carefully open the foil pouch. The resting time here is crucial—allow the garlic to cool for at least 5 to 10 minutes. If you try to handle it immediately, you risk burns. Once cooled, squeeze the bottom of the garlic bulb; the cloves should slide out like a soft paste. This paste acts as a flavor marinade for the mash, infusing every bite with sweetness.
Step 4: Drain and Dry the Cauliflower
This is the most important step for a non-watery mash. Once steamed, drain the cauliflower and let it sit in the colander for a few minutes. Use a clean kitchen towel or paper towels to gently pat the florets dry. Removing excess moisture ensures the seasoning and fats adhere properly to the vegetable rather than sliding off.
Step 5: Blend to Perfection
Transfer the warm cauliflower florets into a food processor or high-speed blender. Add the roasted garlic paste, butter, cream, and your seasoning (salt, pepper, and onion powder). Pulse the mixture until it reaches your desired consistency. For a rustic mash, pulse only a few times. For a silkier, potato-like texture, blend on high for 30 to 45 seconds.
Step 6: Fold and Flavor
Taste the mash. This is the time to adjust your seasoning. If you are using Parmesan cheese, fold it in while the mash is still steaming hot so it melts into the mixture. If the mash feels too thick, add one tablespoon of cream at a time until it reaches the perfect serving size consistency.
Step 7: Final Assembly and Serving
Transfer the mash to a warm serving bowl. Use the back of a spoon to create decorative swirls on the surface. Sprinkle with fresh chives and perhaps an extra pinch of black pepper. This dish is best served immediately while piping hot.
To get the creamiest result, never boil the cauliflower in water; always steam it. Boiling causes the cauliflower to absorb too much water, leading to a runny mash. Additionally, if you are serving this alongside a protein like a pan-seared steak or roasted chicken, use the resting time of the meat to do your final blending. This ensures everything hits the table at the perfect temperature. If you want a deeper flavor, try “browned butter” instead of regular butter to add a toasted, nutty aroma to the dish.

Variations & Substitutions
The beauty of roasted garlic cauliflower mash is its versatility. You can easily adapt this recipe to suit various dietary needs or flavor preferences. For a Vegan Version, replace the butter with a high-quality vegan butter or extra virgin olive oil, and use full-fat coconut milk or cashew cream in place of heavy cream.
If you want to boost the Protein content, you can blend in 1/4 cup of silken tofu or a scoop of unflavored collagen peptides; this doesn’t change the flavor but makes the dish more satiating as a main course. For a Loaded Mash, treat it like a baked potato by folding in crispy bacon bits, shredded cheddar cheese, and a dollop of sour cream. If you prefer a more herbaceous profile, add fresh rosemary or thyme to the garlic roasting pouch for an infused oil effect.
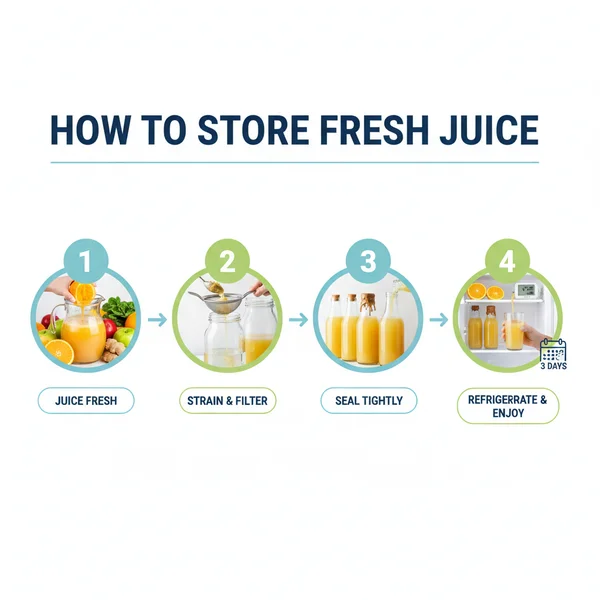
Storage & Make Ahead Instructions
This dish stores surprisingly well, making it a great candidate for meal prep. Store any leftover roasted garlic cauliflower mash in an airtight container in the refrigerator for up to 4 days. When reheating, avoid the microwave if possible; instead, warm it in a saucepan over low heat, adding a splash of milk or cream to loosen the texture.
While you can freeze this dish, the texture may change slightly upon thawing. If you do freeze it, ensure it is in a vacuum-sealed bag. To serve after freezing, reheat it in a pan and give it a quick whip with a whisk to restore the creamy emulsion. For make-ahead prep, you can roast the garlic up to two days in advance.
Nutrition Information (Per Serving)
Understanding the nutritional profile helps in balancing your plate, especially when pairing this side dish with a heavy protein.
- Calories: 185 kcal
- Net Carbs: 7g
- Protein: 5g
- Healthy Fats: 14g
- Fiber: 4g
- Serving Size: Approx 1 cup
This roasted garlic cauliflower mash is more than just a low-carb substitute; it is a sophisticated dish that stands on its own. By taking the time to roast the garlic properly and ensuring the cauliflower is dry before mashing, you create a texture that rivals any traditional potato dish. It pairs beautifully with proteins that have a strong sear. While your steak reaches its perfect internal temperature on the grill, this mash provides the velvety contrast needed for a balanced meal. Give this recipe a try for your next Sunday roast or holiday gathering, and watch as your guests ask for second helpings of “the best mashed potatoes they’ve ever had,” only to be surprised it’s actually cauliflower!
❓ Frequently Asked Questions
1
How long does roasted garlic cauliflower mash last in fridge?
This dish stays fresh in an airtight container for up to four days. To maintain the best texture, reheat it gently in a saucepan over medium-low heat or in the microwave. Adding a splash of cream or butter during reheating can help restore its original creamy consistency.
2
Can I make roasted garlic cauliflower mash ahead of time?
Absolutely! You can roast the garlic and steam the cauliflower a day in advance. Store them separately in the fridge, then blend and heat them together when you are ready to serve. This makes it a perfect time-saving side dish for busy weeknight dinners or holiday meals.
3
What can I substitute for butter in this recipe?
For a vegan version, substitute the butter with olive oil. You can also use a dollop of Greek yogurt to add a boost of protein and creaminess without the fat. Some chefs use a dash of vegetable stock to thin the mash if it becomes too thick.
4
How do I know when the cauliflower mash is done?
The cauliflower is done when it is fork-tender. Unlike meat, you do not need to check for an internal temperature; simply ensure it is soft enough to puree easily. The total cooking time will vary based on whether you choose to steam or roast the florets before mashing.
5
Can I freeze roasted garlic cauliflower mash?
Yes, you can freeze this mash for up to two months in a freezer-safe bag. Press out the air to prevent ice crystals. When ready to eat, thaw it overnight in the refrigerator. You may need to add a bit of fresh seasoning and stir well after reheating.