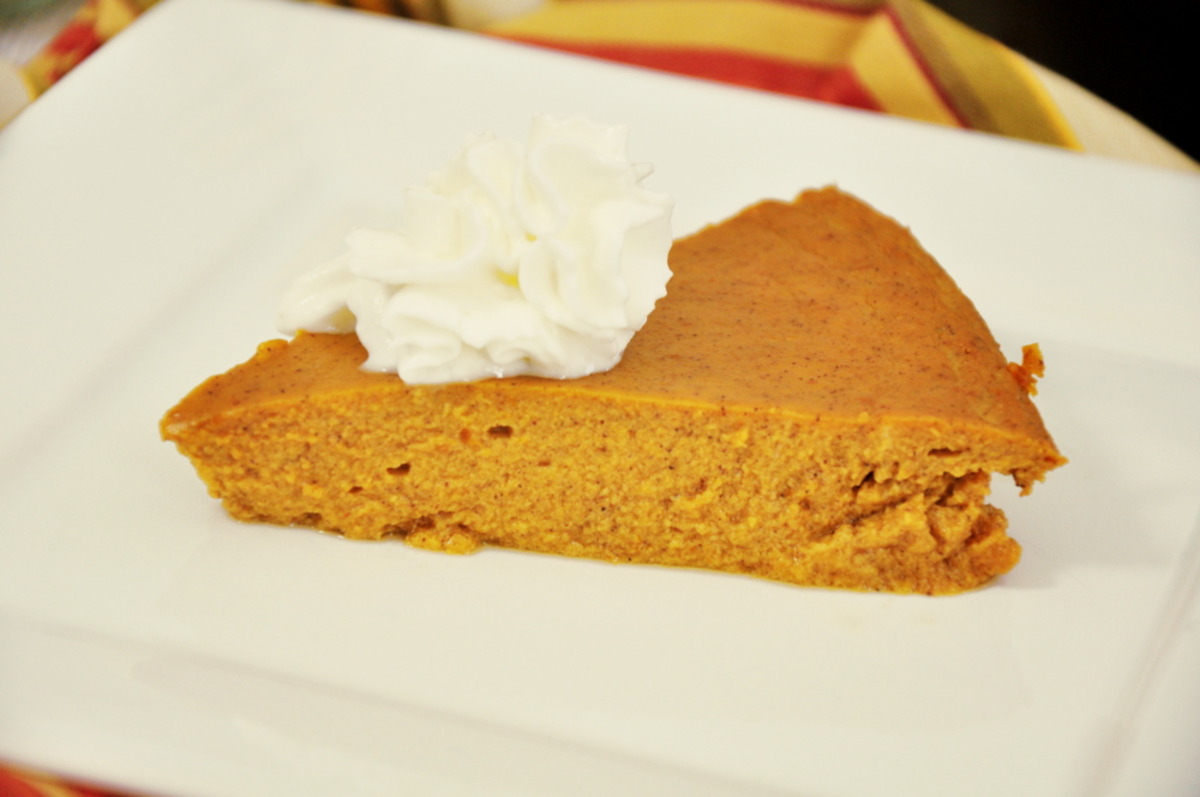
Crustless Pumpkin Pie Recipe: Easy & Delicious
Imagine the aroma of warm cinnamon, earthy nutmeg, and sweet cloves wafting through your kitchen on a crisp autumn afternoon. Whether you are preparing a grand Thanksgiving feast, hosting a cozy neighborhood gathering, or simply craving the quintessential flavors of fall, this crustless pumpkin pie recipe is the ultimate solution for dessert lovers. This particular version of the classic holiday staple is special because it strips away the heavy, often difficult-to-perfect pastry shell, leaving behind only the velvety, custard-like center that everyone craves. It is a lighter alternative that focuses entirely on the rich, spiced pumpkin flavor, making it a perfect choice for those who want a gluten-conscious option or simply want to save time in the kitchen. Busy home cooks and health-conscious foodies alike will fall in love with how quickly this dish comes together without sacrificing a single ounce of traditional flavor.
- ⏱️ Prep Time: 10 minutes
- 🍳 Cook Time: 50 minutes
- 👥 Servings: 8 servings
- 📊 Difficulty: Easy
Ingredients for the Perfect Crustless Pumpkin Pie
To ensure your crustless pumpkin pie recipe turns out with the perfect consistency—firm enough to slice but soft enough to melt in your mouth—you will need the following high-quality ingredients. Organizing these components beforehand will make the assembly process seamless.
Main Batter Ingredients:
- 1 can (15 ounces) of pure pumpkin puree (ensure it is not pumpkin pie filling)
- 3 large eggs, preferably at room temperature
- 1 cup granulated white sugar (you can also use brown sugar for a deeper molasses flavor)
- 2/3 cup all-purpose flour (this provides the necessary structure in the absence of a crust)
- 1 teaspoon baking powder
- 1/4 teaspoon salt
- 1 tablespoon pumpkin pie spice (a blend of cinnamon, ginger, cloves, and nutmeg)
- 1 teaspoon pure vanilla extract
- 1 cup evaporated milk (for a rich, creamy texture)
- 2 tablespoons unsalted butter, melted and slightly cooled
Optional Toppings and Garnishes:
- Freshly whipped cream for serving
- A light drizzle of cream cheese icing or frosting for extra sweetness
- Extra cinnamon for dusting
Step-by-Step Instructions
Following these detailed steps will ensure your dessert has the perfect bake and the ideal flavor profile. While this crustless pumpkin pie recipe is incredibly straightforward, paying attention to the details of mixing and temperature will elevate it from a simple custard to a professional-grade dessert.
Step 1: Preheat and Prepare Your Baking Dish
Start by preheating your oven to 350 degrees Fahrenheit (175 degrees Celsius). While the oven reaches the correct temperature, you must prepare your baking vessel. Choose a 9-inch deep-dish pie plate or a similar-sized round ceramic baking dish. Because there is no crust to act as a barrier, you must grease the dish thoroughly. Use a small amount of softened butter or a high-quality non-stick cooking spray to coat the bottom and all the way up the sides. This ensures that each slice releases cleanly when you are ready to serve.
Step 2: Combine the Dry Structural Ingredients
In a medium-sized mixing bowl, whisk together the flour, baking powder, and salt. The inclusion of flour and baking powder is vital in a crustless pumpkin pie recipe; the flour acts as a thickener that mimics the bite of a traditional pie, while the baking powder provides a very subtle lift, preventing the custard from becoming too dense or rubbery. Ensure these are well-combined so there are no clumps of flour in the finished product.
Step 3: Prepare the Egg and Sugar Base
In a separate large mixing bowl, crack the three large eggs. Using a whisk or an electric hand mixer on medium speed, beat the eggs for about one minute until they are slightly frothy. Gradually add the granulated sugar while continuing to beat the mixture. You want the sugar to begin dissolving into the eggs, creating a pale yellow, slightly thickened base. This step is essential for achieving a smooth, professional texture in the final bake.
Step 4: Incorporate the Pumpkin and Aromatics
Add the 15 ounces of pure pumpkin puree to the egg and sugar mixture. Follow this with the pumpkin pie spice and the pure vanilla extract. Use your whisk to blend these until the color is a uniform, vibrant orange. The vanilla extract is a secret weapon in this recipe; it rounds out the sharpness of the spices and adds a layer of aromatic sweetness that defines a high-quality dessert.
Step 5: Blend in the Rich Liquid Components
Gently pour in the evaporated milk and the two tablespoons of melted butter. It is important that the butter is not piping hot, as you do not want to prematurely cook the eggs in the batter. Whisk slowly to incorporate the liquids. The melted butter adds a silkiness to the mouthfeel that replaces the fat content usually found in a traditional buttery pie crust.
Step 6: The Final Batter Integration
Slowly fold the dry flour and baking powder mixture into the wet pumpkin batter. Use a spatula to scrape the sides and bottom of the bowl, ensuring every bit of flour is hydrated. Be careful not to over-mix at this stage; you want the ingredients just combined. Over-mixing can develop the gluten in the flour too much, which might lead to a tougher texture rather than a delicate custard.
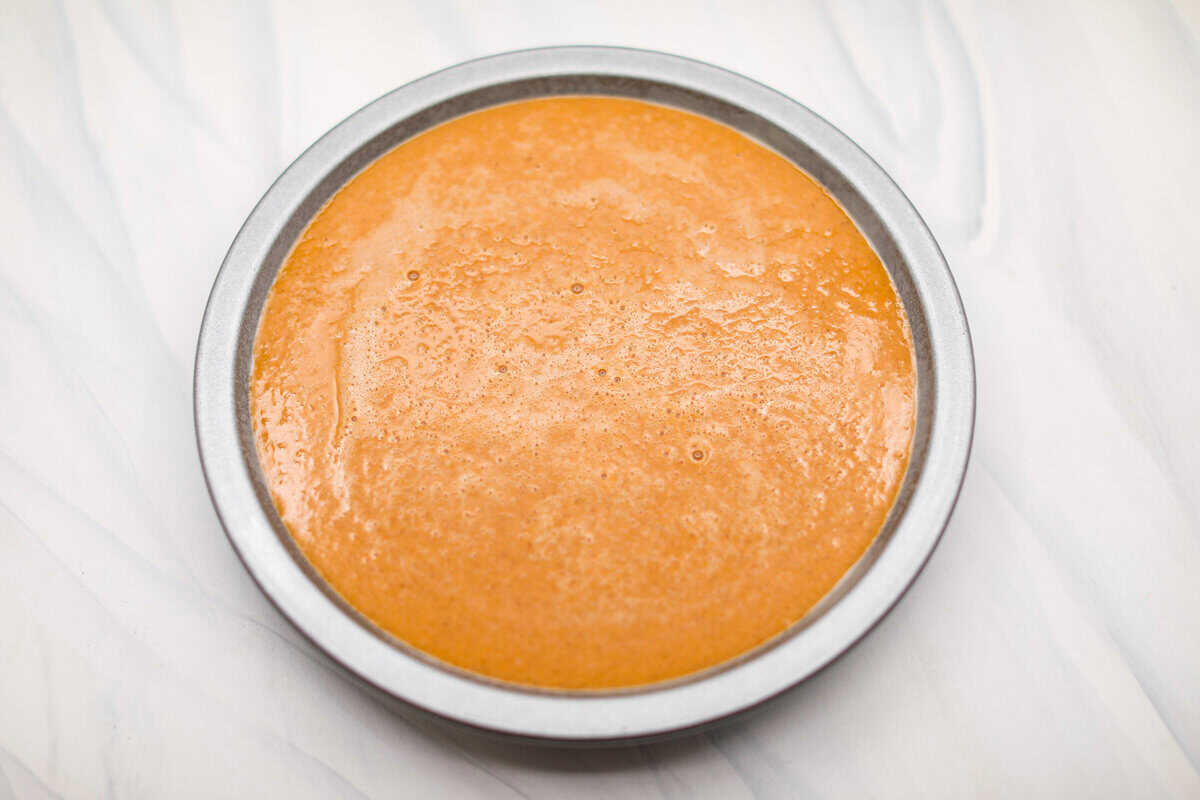
Step 7: The Baking Process
Pour the finished batter into your prepared pie dish. Use a spatula to smooth the top so it is perfectly level. Place the dish on the center rack of your preheated oven. Bake for approximately 45 to 50 minutes. You will know the pie is done when the edges are set and slightly puffed, but the very center still has a slight, rhythmic jiggle when the pan is gently shaken. A toothpick inserted near the center should come out clean, though it may look slightly moist.
Step 8: The Essential Cooling Phase
This is perhaps the most difficult step: waiting. Remove the pie from the oven and place it on a wire cooling rack. It must cool completely to room temperature, which usually takes about two hours. As it cools, the custard will finish setting and firm up. For the best slicing experience, refrigerate the pie for at least another two hours after it reaches room temperature. This cold set is what allows you to get those clean, beautiful wedges.
For the smoothest texture, strain your pumpkin puree through a fine-mesh sieve before mixing to remove any fibrous bits. Additionally, always use room temperature eggs to ensure they emulsify perfectly with the sugar and butter. If you want a more decadent finish, skip the standard whipped cream and try a dollop of cream cheese icing or a drizzle of vanilla frosting across the top of the chilled pie for a modern twist on the classic flavor profile.
Variations and Substitutions
This crustless pumpkin pie recipe is incredibly versatile and can be adapted to suit various dietary needs or flavor preferences. If you are looking for a dairy-free version, you can substitute the evaporated milk with full-fat canned coconut milk, which adds a lovely tropical undertone. For those avoiding refined sugar, coconut sugar or a monk fruit sweetener can be used in a 1:1 ratio. If you want to enhance the texture, try adding half a cup of chopped pecans or walnuts to the batter before baking for a “crunchy” element that contrasts with the smooth custard. You can also experiment with the topping; while whipped cream is traditional, a thin layer of vanilla icing can turn this into more of a “fudge” style dessert that children will absolutely adore.
Storage and Make-Ahead Instructions
One of the best features of this dessert is how well it holds up over time. To store leftovers, cover the pie dish tightly with plastic wrap or aluminum foil and keep it in the refrigerator for up to four days. This actually makes it an ideal make-ahead dessert; the flavors of the spices and the vanilla extract often deepen and become more pronounced after a day in the fridge. While you can freeze this pie for up to one month, be aware that the texture of custard-based dishes can sometimes change slightly upon thawing, potentially becoming a bit more watery. For the best results, always serve chilled or at room temperature.
Nutrition Information
- Calories: 185 kcal
- Total Fat: 6g
- Carbohydrates: 28g
- Protein: 5g
- Fiber: 2g
- Sugars: 22g
Note: Nutritional values are estimates based on standard ingredients and do not include optional toppings like whipped cream or frosting.
Choosing a crustless pumpkin pie recipe is not just a way to save on calories; it is a way to celebrate the pure, unadulterated essence of the pumpkin season. By eliminating the floury barrier of a crust, you allow the spices, the sugar, and the creamy pumpkin to take center stage. Whether topped with a mountain of whipped cream or a elegant drizzle of icing, this dessert is sure to become a recurring favorite in your household. Its simplicity makes it accessible for beginner bakers, while its refined flavor will satisfy even the most discerning dessert connoisseurs. Enjoy the process of creating this golden, spiced masterpiece and the joy of sharing it with those you love.
❓ Frequently Asked Questions
1
How long does crustless pumpkin pie last in fridge?
This pie stays fresh for 3 to 4 days when stored in an airtight container or covered tightly with plastic wrap. Keeping it chilled helps maintain its custardy texture and prevents the pumpkin base from weeping, ensuring every slice remains delicious for several days after baking.
2
Can I make crustless pumpkin pie ahead of time?
Yes, this is an excellent make-ahead dessert! In fact, it often tastes better the next day after the spices have fully melded. Bake it a day in advance, let it cool completely, and store it in the refrigerator until you are ready to serve your guests.
3
What can I substitute for all-purpose flour?
To keep the pie gluten-free, you can substitute all-purpose flour with a 1:1 gluten-free baking blend or even almond flour for a nuttier flavor. Since the flour amount is very small, these swaps won’t significantly alter the structure or the creamy consistency of the finished dessert.
4
How do I know when the pie is done?
The pie is ready when the edges are set and slightly golden, but the center still has a very slight jiggle when shaken. You can also insert a knife near the center; if it comes out clean, the custard has properly set and is ready to cool.
5
Can I freeze crustless pumpkin pie?
While you can freeze it, the texture may change slightly upon thawing. If you must freeze, wrap it tightly in several layers of plastic wrap and foil for up to one month. Thaw slowly in the refrigerator overnight to minimize moisture loss and preserve the delicate texture.