Homemade Granola Bars with Banana: Easy & Healthy
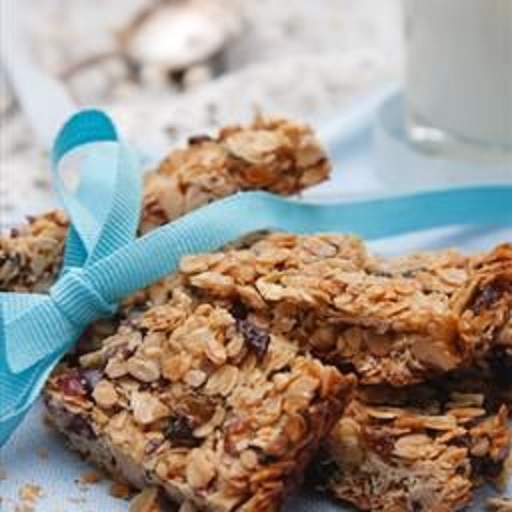
There is something truly magical about the aroma of sun-ripened bananas and toasted oats filling your home on a quiet Sunday morning. If you are looking for a snack that balances wholesome nutrition with the natural sweetness of fruit, these homemade granola bars with banana are exactly what you need. Unlike store-bought options that are often packed with refined sugars and mysterious preservatives, this recipe relies on the creamy texture of mashed bananas to bind everything together perfectly. Whether you are a busy parent seeking a quick lunchbox addition or a fitness enthusiast needing a healthy pre-workout fuel boost, you will love how easy and satisfying these bars are to prepare.

- ⏱️ Prep Time: 10 minutes
- 🍳 Cook Time: 25 minutes
- 👥 Servings: 12 servings
- 📊 Difficulty: Easy
Ingredients for Success
To create the best homemade granola bars with banana, you will need a handful of pantry staples. Using high-quality ingredients will ensure your bars have the best flavor and texture possible.
- 2 cups Old-fashioned rolled oats (avoid instant oats for better texture)
- 2 large Ripe bananas (the spottier, the better)
- 1/2 cup Creamy almond butter or peanut butter
- 1/4 cup Honey or pure maple syrup
- 1 teaspoon Pure vanilla extract
- 1/2 teaspoon Ground cinnamon
- 1/4 teaspoon Sea salt
- 1/2 cup Dark chocolate chips or mini chocolate chips
- 1/4 cup Chopped walnuts or pumpkin seeds (optional for crunch)
Step-by-Step Instructions
1. The first step in this recipe is to prepare your baking environment. Begin by preheating your oven to 350 degrees Fahrenheit (175 degrees Celsius). While the oven is reaching the correct temperature, take an 8×8-inch square baking pan and line it with parchment paper. Make sure to leave a little bit of overhang on two sides of the pan; these parchment “handles” will make it significantly easier to lift the bars out once they have finished baking and cooling. If you do not have parchment paper, you can lightly grease the pan with a small amount of coconut oil.
2. Now, focus on your primary binder: the bananas. Peel your two large, ripe bananas and place them into a large mixing bowl. Using a sturdy fork or a potato masher, crush the bananas until they reach a smooth, liquid-like consistency. A few small lumps are perfectly fine, but the smoother the puree, the more evenly the moisture will be distributed throughout your homemade granola bars with banana. Ripe bananas are essential here because they provide the necessary natural sugar and the structural integrity needed to keep the bars from falling apart.
3. Once the bananas are mashed, it is time to add your liquid ingredients. Pour in the nut butter of your choice, the honey or maple syrup, and the vanilla extract. Use a whisk or a silicone spatula to combine these ingredients thoroughly with the banana puree. You want a cohesive, sticky mixture. If your nut butter is a bit stiff because it was stored in the refrigerator, you can microwave it for ten seconds to soften it before adding it to the bowl, which makes the mixing process much smoother.
4. It is now time to incorporate the dry components of the recipe. Add the rolled oats, ground cinnamon, and sea salt into the wet mixture. Use a large spoon to fold the ingredients together. Take your time with this step to ensure that every single oat grain is thoroughly coated in the banana and nut butter mixture. This thorough coating is what prevents the bars from being dry or crumbly. The cinnamon and salt act as flavor enhancers, bringing out the warmth of the oats and the sweetness of the fruit.
5. If you are using mix-ins like dark chocolate chips or walnuts, fold them in gently at this stage. Distribute them evenly throughout the batter so that every serving contains a bit of crunch or chocolatey goodness. If you find the mixture looks a little too wet, you can add an extra tablespoon or two of oats, but remember that the mixture should be thick and slightly tacky to the touch.
6. Transfer the granola mixture into your prepared baking pan. Using the back of a spoon or a piece of parchment paper, press the mixture down firmly. This is a critical part of the instructions: if you do not pack the mixture tightly into the pan, the bars will be too loose and may crumble when you try to slice them. Pay extra attention to the corners and edges to ensure an even thickness across the entire pan.
7. Place the pan on the center rack of your preheated oven. Set your timer for a cooking time of 25 minutes. You will know the bars are ready when the edges begin to turn a beautiful golden brown and the top feels firm to the touch. The kitchen will smell incredible at this point, but resist the urge to take them out too early; they need that full time to set their structure.
8. Once the cooking time is complete, remove the pan from the oven and set it on a wire cooling rack. This is perhaps the most important instruction: let the bars cool completely in the pan for at least 30 to 60 minutes. If you try to cut them while they are still warm, they will fall apart. For the cleanest slices, you can even pop the pan into the refrigerator for 20 minutes once it has reached room temperature. Finally, lift the parchment handles, place the block on a cutting board, and slice into 12 even bars.
For the best results, use bananas that have plenty of brown spots on the skin; these are sweeter and mash more easily. If you want a “sturdier” bar for hiking or travel, add 2 tablespoons of ground flaxseed to the mixture. Always use a very sharp chef’s knife when slicing to ensure clean edges and minimal crumbling.
Variations & Substitutions
One of the best things about this recipe is how adaptable it is to different dietary needs. To make these bars vegan, simply ensure you are using maple syrup instead of honey. If you require a gluten-free snack, make sure to purchase certified gluten-free rolled oats, as standard oats are sometimes processed in facilities that handle wheat. For those with nut allergies, you can easily substitute the almond butter with sunflower seed butter or tahini for a similar creamy texture. If you want to boost the protein content, you can replace half a cup of oats with a half cup of your favorite vanilla protein powder. For a tropical twist, try adding dried pineapple and shredded coconut to the mix-ins.
Storage & Make Ahead
These homemade granola bars with banana store exceptionally well, making them perfect for meal prep. You can keep them in an airtight container at room temperature for up to three days. However, because of the moisture content in the bananas, they stay freshest if kept in the refrigerator, where they will last for up to one week. For long-term storage, wrap individual bars in plastic wrap or parchment paper and place them in a freezer-safe bag. They can be frozen for up to three months. Simply thaw a bar at room temperature for 15 minutes before enjoying it.
Nutrition Information (Per Serving)
Calories: 185 kcal
Total Fat: 9g
Carbohydrates: 24g
Protein: 5g
Fiber: 4g
Sugar: 11g
❓ Frequently Asked Questions
1
How long does banana granola bars last in fridge?
These homemade granola bars with banana stay fresh in an airtight container in the refrigerator for up to one week. Because they contain fresh fruit, keeping them chilled prevents spoilage and helps maintain their chewy texture. For the best flavor, let them sit at room temperature briefly before eating.
2
Can I make banana granola bars ahead of time?
Yes, this recipe is perfect for meal prep. You can bake a large batch over the weekend and store them for quick snacks throughout the week. They hold their shape well and are even easier to slice once they have had time to set properly in the fridge overnight.
3
What can I substitute for peanut butter?
If you have a nut allergy or prefer a different taste, you can easily substitute peanut butter with almond butter, cashew butter, or sunflower seed butter. For a lower-fat option, some people use applesauce, though the bars will be softer and slightly less structurally firm without the nut butter binder.
4
How do I know when banana granola bars are done?
The bars are done when the edges are golden brown and the top feels firm to the touch. It usually takes about 25 minutes at 350°F. Don’t worry if the center feels slightly soft; the ingredients will continue to firm up significantly as the bars cool outside of the oven.
5
Can I freeze banana granola bars?
Absolutely! Wrap individual bars tightly in plastic wrap and store them in a freezer-safe bag for up to three months. This is a great way to always have a healthy snack on hand. Simply thaw a bar in the fridge or at room temperature for about 30 minutes before enjoying.