Raspberry Chia Jam Recipe: Quick & Healthy
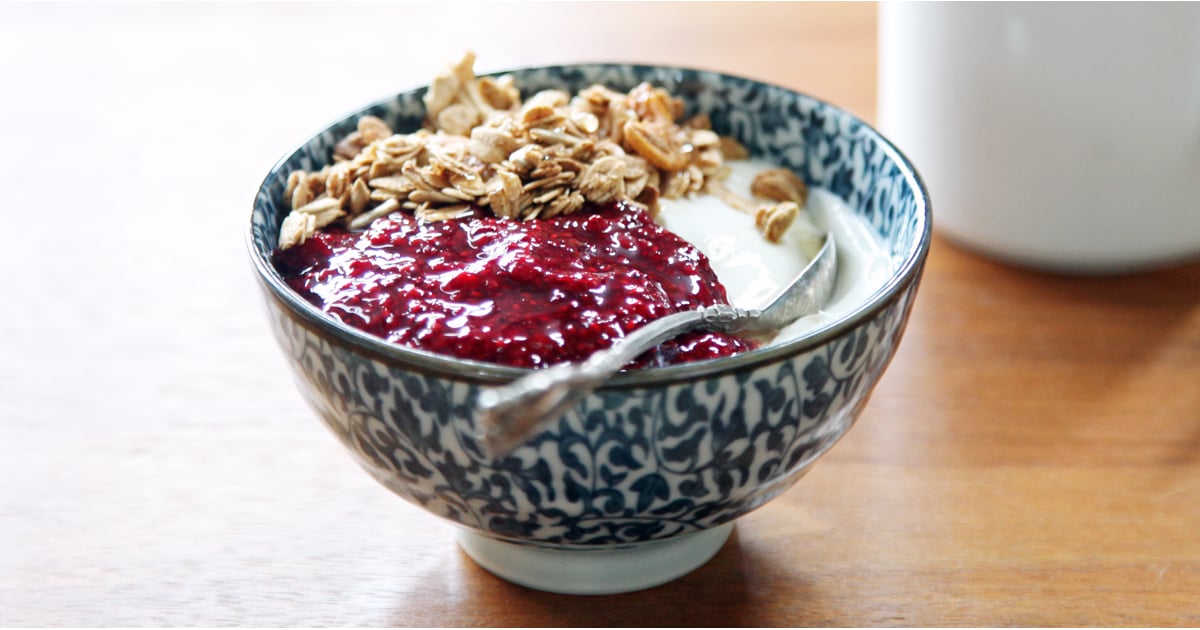
Imagine waking up to the smell of freshly toasted sourdough bread, its warm surface just waiting for the perfect topping. While store-bought preserves are convenient, nothing compares to the vibrant flavor and wholesome goodness of a homemade raspberry chia jam recipe. This recipe is the perfect addition to a cozy family breakfast, a sophisticated brunch party, or even as a comforting swirl in your evening yogurt. You will love how the bright, tart notes of sun-ripened raspberries dance with the subtle sweetness of maple syrup, all held together by the nutritional powerhouse that is the chia seed. This dish is designed for anyone who craves a healthy, low-sugar alternative to traditional jams without sacrificing that classic, mouth-watering jam consistency that everyone adores.

- ⏱️ Prep Time: 5 minutes
- 🍳 Cook Time: 10 minutes
- 👥 Servings: 12 servings
- 📊 Difficulty: Easy
Essential Ingredients
The beauty of this raspberry chia jam recipe lies in its simplicity. You only need a handful of high-quality ingredients to create a spread that tastes far superior to anything found on a grocery store shelf. Below are the items you will need to gather before you begin your cooking time.
- Fresh or Frozen Raspberries: 3 cups (approximately 12 ounces). If you use frozen berries, there is no need to thaw them beforehand; they will melt down perfectly in the pan.
- Chia Seeds: 2 tablespoons of black or white chia seeds. These act as the natural thickening agent and add a boost of fiber and omega-3 fatty acids.
- Liquid Sweetener: 2 to 3 tablespoons of pure maple syrup or raw honey. This allows you to control the sweetness level based on the ripeness of your berries.
- Lemon Juice: 1 tablespoon of freshly squeezed lemon juice. The acidity helps to brighten the fruit flavors and assists in the setting process.
- Vanilla Extract: 1/2 teaspoon of pure vanilla extract. This adds a layer of warmth and complexity to the finished recipe.
- Water: 1 tablespoon (optional), only if your berries are particularly dry or if you prefer a slightly thinner consistency.
Step-by-Step Instructions
Follow these detailed instructions to ensure your jam turns out perfectly every single time. The process is quick, but paying attention to the texture changes will help you master the art of chia-based preserves.
Step 1: Preparing the Berries
Begin by placing your 3 cups of raspberries into a medium-sized non-stick saucepan. If you are using fresh berries, give them a quick rinse under cool water and pat them dry before adding them to the pot. If using frozen berries, you can pour them directly from the bag. Set your stove to medium heat. You want the berries to start breaking down slowly so they release their natural juices without scorching the bottom of the pan. This initial phase of the cooking time is crucial for developing the deep red color and concentrated flavor that makes this jam so special.
Step 2: The Softening Process
As the raspberries heat up, they will begin to release liquid and soften. Use a heat-resistant spatula or a wooden spoon to stir them occasionally. After about 3 to 5 minutes, you will notice the berries losing their shape and turning into a thick, bubbling sauce. This is the stage where the kitchen will begin to smell absolutely incredible. Keep the heat at a steady medium; if the mixture starts to bubble too aggressively, turn the heat down slightly to a simmer.
Step 3: Mashing for Texture
Once the raspberries are soft and juicy, use a fork or a potato masher to crush the fruit to your desired consistency. If you enjoy a “chunky” jam with bits of whole fruit, a light mash will suffice. For a smoother, more refined spread, continue mashing until most of the large lumps are gone. Remember that the chia seeds will add their own unique texture later, so keep that in mind as you decide how much fruit pulp you want to remain in the mix.
Step 4: Incorporating Sweetener and Citrus
With the berries mashed, it is time to add your sweetener and lemon juice. Pour in the maple syrup and the freshly squeezed lemon juice. Stir the mixture well to ensure the flavors are fully integrated. At this point, I highly recommend doing a small taste test (be careful, it will be hot!). If your raspberries were particularly tart, you might want to add an extra tablespoon of sweetener. The lemon juice provides a necessary tang that balances the natural sugars and helps the jam feel fresh rather than cloying.
Step 5: The Magic of Chia Seeds
Now, sprinkle the 2 tablespoons of chia seeds evenly over the raspberry mixture. Stir them in thoroughly so they don’t clump together. The chia seeds are the “secret” to this recipe; they absorb many times their weight in liquid, creating a gel-like structure that thickens the sauce into a jam without the need for artificial pectin or hours of boiling. Once the seeds are in, let the mixture simmer for another 2 to 3 minutes, stirring constantly to prevent sticking.
Step 6: Adding the Final Flourish
Remove the saucepan from the heat. This is the moment to stir in your vanilla extract. Adding the vanilla at the very end ensures that its delicate aroma doesn’t evaporate during the boiling process. Give the jam one last vigorous stir, making sure the chia seeds are distributed evenly throughout the vibrant red fruit base.
Step 7: The Cooling and Setting Phase
The jam will still look a bit runny at this point, but do not be tempted to add more chia seeds yet! Transfer the jam into a clean glass jar or a heat-safe bowl. Let it sit at room temperature for at least 20 minutes. As the temperature drops, the chia seeds will continue to expand and work their magic, significantly thickening the mixture. You will see the transformation from a fruit sauce into a spreadable, luscious jam right before your eyes.
Step 8: Final Consistency Check and Refrigeration
Once the jam has cooled to room temperature, give it a stir. If you prefer an even thicker jam, you can let it set in the refrigerator for a few hours. The cold temperature will further firm up the gel. After the setting time is complete, your raspberry chia jam recipe is ready to be enjoyed! Spread it on toast, dollop it on pancakes, or stir it into your morning oats for a burst of berry flavor.
To get the most out of your jam, try using a combination of different berries like blackberries or strawberries for a “forest fruit” blend. If you want a perfectly smooth jam, you can run the cooked raspberry mixture through a fine-mesh sieve to remove the raspberry seeds before adding the chia seeds, though this will take a bit more effort. Also, always use a clean spoon when scooping jam from the jar to prevent spoilage and extend its shelf life!

Variations & Substitutions
This raspberry chia jam recipe is incredibly versatile and can be adapted to suit various dietary needs and flavor preferences. For a vegan version, stick with maple syrup or agave nectar as your sweetener. If you are following a ketogenic or low-carb lifestyle, you can substitute the maple syrup with a liquid monk fruit sweetener or stevia drops to keep the calories and sugar count to a minimum.
Flavor variations are endless! You can add a teaspoon of orange zest for a citrusy twist, or a pinch of ground cinnamon for a warm, spiced undertone that pairs beautifully with autumn breakfasts. If you find raspberries too tart, try a 50/50 split with sweet blueberries. The chia seeds will work exactly the same way regardless of the berry variety you choose, making this a reliable base recipe for all your fruit preserve experiments.
Storage & Make Ahead
Because this recipe does not contain the high amounts of sugar found in traditional preserves, it does not have the same multi-year shelf life. However, it stores beautifully in the refrigerator for up to 10 to 14 days when kept in an airtight glass jar. For long-term storage, you can freeze this jam! Simply leave a little bit of headspace at the top of a freezer-safe jar to allow for expansion, and freeze for up to three months. When you are ready to use it, let it thaw overnight in the fridge. This makes it a fantastic make-ahead option for busy weeks or meal prep sessions.
Nutrition Info
- 🔥 Calories: 25 kcal
- 🍞 Carbohydrates: 5g
- 💪 Protein: 0.5g
- 🥑 Fat: 0.5g
- 🌾 Fiber: 2g
- 🍭 Sugar: 3g
Note: Nutritional values are estimates based on standard ingredients and may vary depending on the specific brands used and the amount of sweetener added.
Creating your own raspberry chia jam is a rewarding experience that brings a touch of gourmet flair to your daily routine. With a prep time of only five minutes and a short cooking time, there is no reason not to swap out the processed jars for this fresh, nutrient-dense alternative. Whether you are serving it to guests or enjoying a quiet morning alone, the bright flavors and healthy ingredients are sure to make this recipe a staple in your kitchen. Enjoy the process of making something wholesome from scratch, and savor every berry-filled bite!
❓ Frequently Asked Questions
1
How long does raspberry chia jam last in fridge?
This homemade raspberry chia jam typically stays fresh for seven to ten days when stored in an airtight container in the refrigerator. Since it lacks the high sugar content of traditional preserves, it doesn’t have the same shelf life, so it is best enjoyed within a week of making.
2
Can I make raspberry chia jam ahead of time?
Yes, making this jam ahead of time is actually recommended! Preparing it at least a few hours before you need it allows the chia seeds to fully hydrate and reach the perfect spreadable consistency. It’s an excellent addition to your weekly meal prep routine for quick, healthy breakfasts.
3
What can I substitute for maple syrup?
You can easily substitute maple syrup with honey, agave nectar, or even a granulated sweetener like monk fruit if you want a lower-calorie option. If your raspberries are particularly ripe and sweet, you may even find that you can skip the added sweetener entirely for a tart, natural flavor.
4
How do I know when raspberry chia jam is done?
The jam is done when the raspberries have broken down into a sauce-like consistency and the mixture has thickened slightly on the heat. Remember that the chia seeds will continue to absorb liquid and thicken the jam significantly as it cools down in the refrigerator after the cooking process.
5
Can I freeze raspberry chia jam?
Absolutely! This jam freezes exceptionally well for up to three months. To freeze, leave about half an inch of headspace at the top of a freezer-safe jar to allow for expansion. Thaw it overnight in the refrigerator before using it on your favorite toast, oats, or dessert dishes.