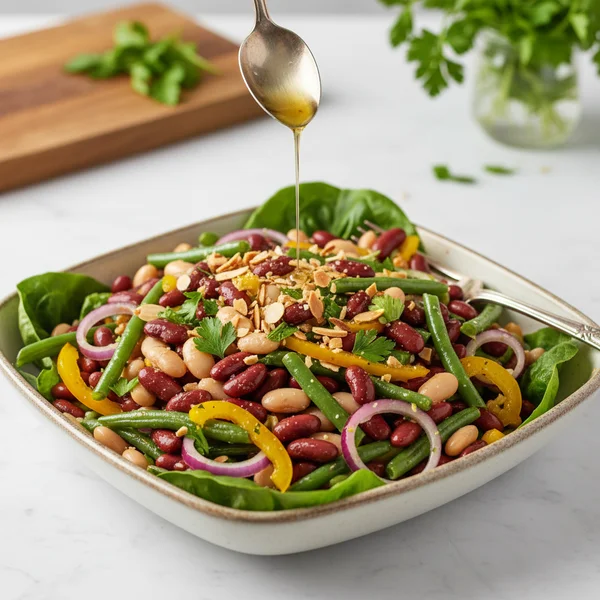
Easy Three Bean Salad: Quick & Healthy
Whether you are preparing for a sun-drenched backyard barbecue, a bustling family reunion, or a quiet weeknight dinner, this easy three bean salad is the ultimate versatile side dish. It is a timeless classic that brings a sense of comfort and nostalgia to the table, yet its bright, zesty flavors feel incredibly modern and fresh. This recipe is particularly special because it transforms humble pantry staples into a vibrant, nutritious feast that actually tastes better the longer it sits. Everyone from picky children to health-conscious adults will love the combination of crunchy textures and the tangy-sweet finish of the homemade dressing. It is the kind of reliable dish that becomes a requested favorite at every gathering you attend.
- ⏱️ Prep Time: 15 minutes
- 🍳 Cook Time: 0 minutes
- 👥 Servings: 8 servings
- 📊 Difficulty: Easy
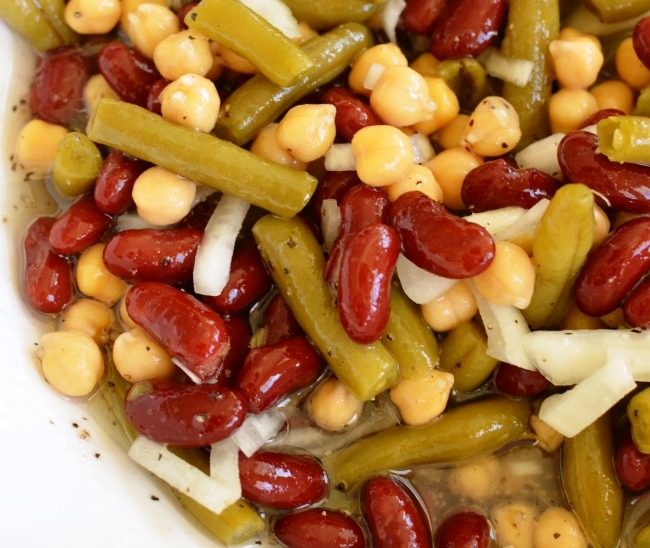
Ingredients for the Ultimate Bean Salad
To create the perfect balance of flavor and texture, you will need a combination of preserved pantry items and crisp, fresh vegetables. This recipe relies on a specific harmony between the earthy legumes and the acidic vinaigrette.
- The Legume Base:
- • 1 can (15 ounces) dark red kidney beans, drained and rinsed thoroughly
- • 1 can (15 ounces) cannellini beans or garbanzo beans, drained and rinsed
- • 1 can (14.5 ounces) cut green beans, drained (or 1.5 cups blanched fresh green beans)
- • 1 can (14.5 ounces) wax beans (yellow beans), drained and rinsed
- The Fresh Vegetable Crunch:
- • 1/2 large red onion, very finely diced
- • 2 stalks of celery, including the tender inner leaves, thinly sliced
- • 1/2 cup fresh Italian flat-leaf parsley, finely chopped
- • 1/4 cup fresh cilantro or mint (optional, for a modern twist)
- The Signature Vinaigrette:
- • 1/3 cup apple cider vinegar (raw and unfiltered preferred)
- • 1/3 cup extra virgin olive oil or a neutral avocado oil
- • 1/4 cup granulated sugar (adjust to your preference for sweetness)
- • 1 teaspoon kosher salt
- • 1/2 teaspoon freshly cracked black pepper
- • 1/2 teaspoon celery seed (the “secret” traditional ingredient)
Step-By-Step Instructions
Following these steps ensures that your easy three bean salad has the perfect consistency. While the process is simple, the technique used to prepare the beans and emulsify the dressing makes a significant difference in the final result.
Step 1: Prepare and Sanitize the Beans
Begin by opening all of your canned beans. Pour the kidney beans, wax beans, and cannellini beans into a large colander in the sink. Rinse them under cold, running water for at least 60 seconds. This step is vital because it removes the viscous liquid and excess sodium found in the canning process, which can otherwise make your salad taste metallic or feel “slimy.” Allow them to drain completely for 5 minutes so that excess water does not dilute your flavorful dressing later.
Step 2: Expertly Dice Your Fresh Vegetables
While the beans are draining, turn your attention to the fresh vegetables. Finely dicing the red onion is key; you want small pieces that provide a sharp bite without overwhelming a single mouthful. If you find raw red onions too pungent, you can soak the diced pieces in ice water for ten minutes and then pat them dry. Slice your celery into thin half-moons. The inclusion of the tender celery leaves adds an extra layer of herbal flavor that pairs beautifully with the beans.
Step 3: Whisk the Zesty Vinaigrette
In a medium glass mixing bowl or a large mason jar, combine the apple cider vinegar, sugar, salt, black pepper, and celery seed. Whisk these ingredients vigorously until the sugar and salt have completely dissolved into the vinegar. Once the base is smooth, slowly drizzle in the olive oil while whisking constantly. This process creates a temporary emulsion, ensuring that the oil and vinegar stay together long enough to coat every surface of the salad uniformly.
Step 4: Combine the Components
Transfer the well-drained beans into a large, non-reactive mixing bowl (glass or stainless steel is best). Add the diced red onions, sliced celery, and chopped parsley. Pour the vinaigrette over the top of the bean mixture. Use a large silicone spatula or two large spoons to gently fold the ingredients together. You want to ensure every bean is glistening with the dressing, but be careful not to mash the softer kidney or cannellini beans.
Step 5: The Essential Chilling Period
While you can serve this salad immediately, it truly reaches its peak flavor after a period of refrigeration. Cover the bowl tightly with plastic wrap or a lid and place it in the refrigerator for at least 2 to 4 hours. Ideally, let it sit overnight. During this time, the porous beans undergo a marination process, absorbing the tang of the vinegar and the sweetness of the sugar. This makes the beans tender and infuses the entire dish with a cohesive flavor profile.
Step 6: Final Toss and Seasoning Adjustment
Just before you are ready to serve, take the salad out of the refrigerator and give it a fresh toss. You will notice that some of the dressing has settled at the bottom of the bowl. Tossing it again redistributes those juices. Taste a spoonful and decide if it needs an extra pinch of salt or a crack of black pepper. If the salad seems too dry, you can add a small splash of vinegar to brighten it back up.
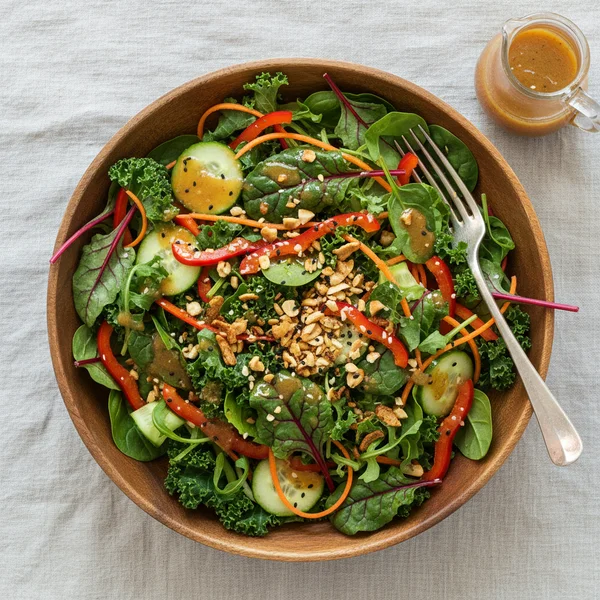
Step 7: Plating with Leafy Greens
To elevate the presentation and add nutritional value, consider serving the bean salad over a bed of fresh leafy greens like arugula, baby spinach, or butter lettuce. The peppery notes of arugula specifically complement the sweetness of the vinaigrette. Simply arrange the greens on a large platter and spoon the marinated beans over the center.
Step 8: Adding Crunchy Toppings
For a professional touch, add crunchy toppings right before the salad hits the table. This provides a contrast to the soft texture of the beans. Toasted sunflower seeds, pepitas, or even some crushed pita chips add a wonderful textural element that keeps every bite interesting.
For the best results, always use high-quality vinegar, as it is the primary flavor driver. If you prefer a less sweet salad, start with half the recommended sugar and add more to taste. To keep the green beans looking vibrant, you can substitute canned green beans with fresh ones that have been blanched in boiling water for 3 minutes and immediately shocked in an ice bath.
Variations & Substitutions
This easy three bean salad is a fantastic canvas for your culinary creativity. If you want to transform it into a Mediterranean-inspired dish, substitute the kidney beans with chickpeas and add crumbled feta cheese, kalamata olives, and fresh oregano. For a healthy Southwestern version, use black beans, pinto beans, and corn, then swap the parsley for cilantro and add a squeeze of fresh lime juice to the vinaigrette. If you are following a vegan diet, this recipe is already naturally plant-based, but you can ensure it remains strictly vegan by using organic sugar or maple syrup as the sweetener. For those who enjoy a bit of heat, adding a finely diced jalapeno or a pinch of red pepper flakes into the dressing will provide a gentle warmth that balances the acidity.
Storage & Make Ahead
One of the greatest advantages of this healthy salad is its incredible shelf life. You can store leftovers in an airtight container in the refrigerator for up to 5 to 7 days. In fact, many people find that the salad is at its absolute best on day three. Because of the acidic nature of the vinaigrette, it acts as a natural preservative for the fresh vegetables. This makes it an ideal candidate for meal prep; you can portion it out into small containers for a quick and nutritious lunch throughout the week. I do not recommend freezing this salad, as the texture of the fresh celery and onions will become mushy upon thawing.
This salad is a nutritional powerhouse, packed with plant-based protein and dietary fiber. One serving typically contains approximately 180 calories, 9 grams of fat, 22 grams of carbohydrates, and 6 grams of protein. It is naturally gluten-free and dairy-free, making it a safe and delicious option for guests with various dietary restrictions.

This easy three bean salad proves that you do not need complicated techniques or expensive ingredients to create a show-stopping dish. By focusing on the quality of your dressing and allowing the ingredients time to mingle, you produce a side dish that is crunchy, tangy, and deeply satisfying. Whether tossed with leafy greens or eaten straight from the bowl, it is a healthy addition to any meal.
❓ Frequently Asked Questions
1
How long does three bean salad last in fridge?
This salad stays fresh and delicious in the refrigerator for three to five days when stored in an airtight container. In fact, many people find that the taste improves after the first twenty-four hours because the beans have more time to soak up the zesty vinaigrette dressing and spices.
2
Can I make three bean salad ahead of time?
Absolutely! This is one of those rare dishes that actually benefits from being made twelve to twenty-four hours in advance. Preparing it early allows the acidity of the vinegar to penetrate the beans and fresh vegetables, resulting in a much more cohesive and flavorful bite for your guests.
3
What can I substitute for green beans?
If you do not have green beans, yellow wax beans or even blanched asparagus pieces work beautifully. You can also experiment with different legumes like black beans or cannellini beans. The key is to maintain a variety of textures and colors to keep the tossed salad visually appealing and nutritious.
4
How do I know when three bean salad is done?
Since there is no cooking involved, the salad is technically ready as soon as it is tossed together. However, you will know it has reached its peak flavor profile once the red onion has softened slightly and the dressing has fully coated all the ingredients without pooling at the bottom.
5
Can I freeze three bean salad?
Freezing is not recommended for this particular recipe. The fresh vegetables like onions and peppers will lose their characteristic crunch, and the texture of the beans can become unpleasantly mushy upon thawing. It is best enjoyed fresh within a few days of preparation for the highest quality and taste.