What Can You Do With Apples: Best Easy Ideas
Apples are among the most versatile fruits in the culinary world. You can enjoy them raw as a crisp snack, bake them into classic desserts like pies and crumbles, or simmer them into savory sauces and chutneys. They are also ideal for juicing, fermenting into cider, or dehydrating into healthy chips. Beyond the kitchen, apples serve as natural sweeteners in smoothies and provide a pectin-rich base for thickening jams and jellies.
The Boundless Culinary Potential of Apples
Apples are far more than just a convenient hand-held snack; they are a cornerstone of global gastronomy due to their unique chemical composition and diverse flavor profiles. From the tart bite of a Granny Smith to the honey-like sweetness of a Fuji, the variety of apples available allows for nearly endless applications in both sweet and savory cooking.
One of the primary reasons apples are so functional in the kitchen is their high pectin content. Pectin is a naturally occurring polysaccharide found in the cell walls of terrestrial plants, and apples are particularly rich in it. This makes them a “secret weapon” for home cooks looking to thicken jams, jellies, and even certain sauces without the need for artificial thickeners. When heated with sugar and acid, the pectin in apples forms a gel-like structure that provides the perfect consistency for preserves.
Furthermore, the balance of malic acid and natural sugars in apples allows them to act as a bridge between different flavor profiles. In savory applications, apples are frequently paired with rich meats like pork, sausages, and poultry. The acidity of the fruit helps cut through the fat of the meat, providing a bright contrast that elevates the entire dish. In salads, apples provide a refreshing crunch that complements bitter greens like kale or arugula and pairs beautifully with sharp cheeses like cheddar or gorgonzola and earthy nuts like walnuts or pecans.
Scientifically, apples are also valued for their ability to withstand high temperatures. While some fruits turn to mush when exposed to heat, many apple varieties—specifically those categorized as “baking apples”—retain their structure. This structural integrity is essential for achieving the perfect texture in tarts, galettes, and baked dumplings. Whether you are caramelizing them in butter for a pancake topping or slow-roasting them with cinnamon, apples offer a reliable performance that few other fruits can match.
Choosing the Right Variety for Your Needs
Before diving into specific recipes, it is crucial to understand that not all apples are created equal. The success of what you do with apples depends heavily on the variety you select.
Best for Baking: When making a pie or a tart, you want an apple that won’t fall apart. Granny Smith, Braeburn, and Honeycrisp are top choices. They offer a balance of tartness and sweetness while maintaining a firm texture after an hour in the oven.
Best for Sauces and Butters: For applesauce or apple butter, you want varieties that break down easily and have a deep, concentrated flavor. McIntosh, Golden Delicious, and Cortland are excellent because they “melt” into a smooth consistency with minimal effort.
Best for Fresh Eating and Salads: If you are looking for a satisfying snap and high juice content, Gala, Fuji, and Pink Lady are the gold standard. These varieties are generally sweeter and have a thinner skin, making them pleasant to eat raw.
Step-by-Step Guide: Classic Homemade Apple Crisp
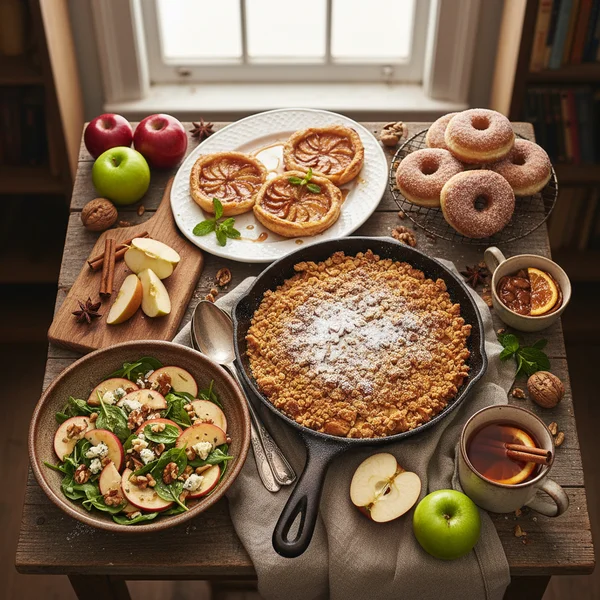
One of the best things you can do with a surplus of apples is to create a comforting, warm apple crisp. This recipe highlights the fruit’s ability to soften into a sweet, syrupy filling while supporting a crunchy, buttery topping. This specific recipe is designed for home cooks who want maximum flavor with minimal prep time.
Recipe Details
- Prep time: 20 minutes
- Cooking time: 45 minutes
- Servings: 6 people
- Calories: Approximately 340 per serving
Ingredients
To create this dish, you will need the following ingredients:


- 6 large Granny Smith or Honeycrisp apples (peeled, cored, and sliced)
- 1/2 cup granulated sugar
- 1 tablespoon ground cinnamon
- 1 tablespoon lemon juice
- 1 cup old-fashioned rolled oats
- 1 cup all-purpose flour
- 1 cup packed brown sugar
- 1/2 cup unsalted butter (cold and cubed)
- A pinch of salt
Instructions
Follow these detailed instructions to achieve the perfect golden-brown finish:
- Preheat and Prepare: Preheat your oven to 375°F (190°C). Lightly grease a 9×9 inch baking dish with butter or non-stick spray.
- Prepare the Filling: In a large mixing bowl, toss the sliced apples with the granulated sugar, lemon juice, and half of the cinnamon. The lemon juice prevents browning and adds a necessary acidic brightness. Transfer the mixture to the prepared baking dish.
- Make the Topping: In a separate bowl, combine the oats, flour, brown sugar, salt, and the remaining cinnamon. Use a pastry cutter or your fingers to work the cold butter into the mixture until it resembles coarse crumbs.
- Assemble: Evenly sprinkle the oat topping over the apple mixture. Do not press it down; leaving it loose allows for a crispier texture.
- Bake: Place the dish in the oven and bake for 40 to 45 minutes. You will know it is done when the fruit is bubbling and the topping is a deep golden brown.
- Serve: Let the crisp cool for at least 10 minutes before serving. This allows the juices to thicken. It is best served warm, perhaps with a scoop of vanilla bean ice cream.
Innovative and Non-Traditional Uses
Beyond standard baking, there are several innovative ways to utilize apples that are often overlooked.
Apple Cider Vinegar: If you have apple scraps (peels and cores), you can ferment them in a sugar-water solution to create homemade apple cider vinegar. This “living” vinegar is excellent for salad dressings and has been praised for various health benefits.
Natural Air Fresheners: Simmering apple slices with cinnamon sticks and cloves in a pot of water creates a natural stovetop potpourri. This is a great way to use up apples that are slightly bruised or past their prime.
Apple Chips: By slicing apples very thinly and baking them at a low temperature (around 225°F) for several hours, you can create crispy, shelf-stable chips. This is a fantastic way to preserve a large harvest without the need for canning equipment.
Savory Glazes: Reduced apple juice or cider can be used as a glaze for roasted carrots or grilled salmon. The natural sugars caramelize beautifully, providing a sophisticated sweetness that isn’t overwhelming.
Important Considerations for Working with Apples
While apples are generally easy to work with, there are a few technical aspects to keep in mind to ensure the best results.
Preventing Oxidation: The most common issue with apples is enzymatic browning. When the flesh is exposed to oxygen, it turns brown. To prevent this, toss sliced apples in a light coating of acidic liquid, such as lemon, lime, or even pineapple juice. If you are prepping a large quantity, keep the slices submerged in a bowl of “acidulated water” (water mixed with a splash of lemon juice) until you are ready to use them.
Storage Practices: Apples emit ethylene gas, which is a ripening agent. If you store apples in a bowl with other fruits like bananas or avocados, those fruits will ripen much faster. To keep apples crisp, store them in the crisper drawer of your refrigerator. They can stay fresh for several weeks when kept cold and humid.
Pesticide Removal: Apples consistently appear on “Dirty Dozen” lists due to pesticide residue on their skins. It is best to wash them thoroughly. A soak in a mixture of water and baking soda for 12–15 minutes has been shown to be more effective at removing residues than water alone.
- Mix Varieties: For the best pies and sauces, use a mix of at least two or three different apple varieties to create a complex depth of flavor and texture.
- Don’t Peel Everything: If you are making applesauce or smoothies, consider leaving the skins on for added fiber and nutrients, provided you have a high-powered blender.
- Freeze for Later: You can freeze sliced apples for future baking. Toss them in a bit of lemon juice and sugar first, then freeze them in a single layer on a tray before transferring them to a freezer bag.
Conclusion
Whether you are looking to create a decadent dessert, a healthy snack, or a sophisticated savory accompaniment, the humble apple is a powerhouse ingredient. By understanding the differences between varieties and mastering basic techniques like preventing oxidation and balancing pectin, you can unlock a vast array of culinary possibilities. From a simple 340-calorie apple crisp to complex fermented vinegars, there is truly no limit to what you can do with apples. Experiment with different textures and flavor pairings to find the method that best suits your palate.
❓ Frequently Asked Questions
1
How long does apple crisp last in fridge?
Homemade apple dishes usually last about three to five days in the refrigerator when stored in an airtight container. To maintain the best texture and flavor, reheat in the oven or air fryer rather than the microwave, which can make the topping or crust quite soggy over time.
2
Can I make apple recipes ahead of time?
Yes, you can prepare many apple recipes ahead of time. You can slice the apples and store them in water with lemon juice, or assemble an entire pie or crisp and keep it in the fridge for 24 hours before baking for the freshest results possible.
3
What can I substitute for Granny Smith apples?
If you do not have Granny Smith apples, look for other firm, tart varieties like Honeycrisp, Braeburn, or Pink Lady. These apples hold their shape well during the cooking process and provide a similar balance of sweetness and acidity required for most baked apple desserts or savory dishes.
4
How do I know when baked apples are done?
You can tell baked apples are finished when they are tender enough to be easily pierced with a fork or paring knife. The juices should be bubbling, and the skins or topping should be golden brown and slightly crisp, depending on the specific instructions of your chosen recipe.
5
Can I freeze cooked apples?
You can freeze cooked apples or apple pie filling for up to three months. Ensure the mixture is completely cooled before placing it in a heavy-duty freezer bag. Squeeze out as much air as possible to prevent freezer burn and preserve the natural flavor and texture of the fruit.