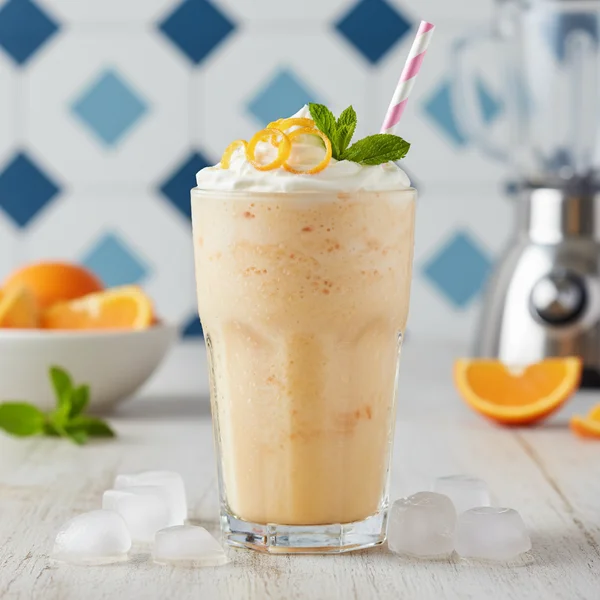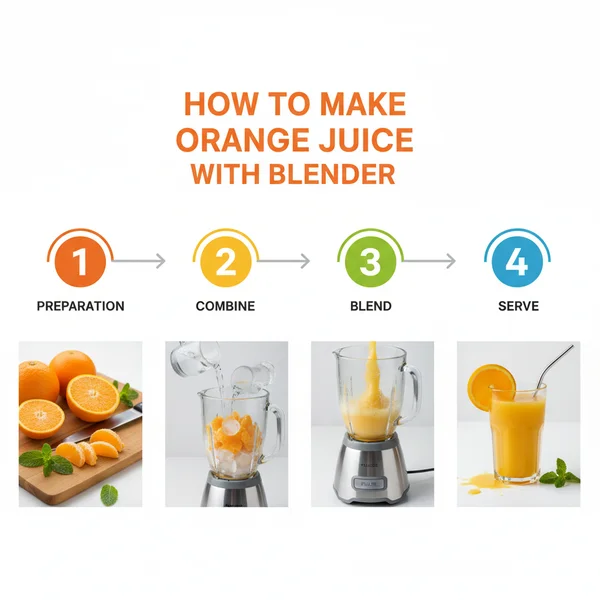
How to Make Orange Juice with Blender: Refreshing & Easy
There is nothing quite like the vibrant, citrusy aroma of fresh oranges to wake up your senses in the morning. While many people believe they need a bulky, expensive juicer to enjoy a glass of liquid sunshine, the truth is that your kitchen blender is the ultimate secret weapon for creating the most refreshing and hydrating drink imaginable. This method is special because it allows you to control the exact texture and sweetness of your beverage while retaining more of the fruit’s natural goodness than traditional extraction methods. Whether you are looking for a quick pick-me-up or a healthy addition to your breakfast table, you will love how this simple technique transforms whole fruit into a smooth, chilled masterpiece in just a few minutes.
- ⏱️ Prep Time: 10 minutes
- 🍳 Cook Time: 0 minutes
- 👥 Servings: 2 servings
- 📊 Difficulty: Easy
Ingredients for Perfect Blender Orange Juice
- 4 to 5 large oranges (Valencia or Navel varieties work best for juice)
- 1/2 cup cold filtered water (adjust for your preferred consistency)
- 1 cup ice cubes (to make it instantly chilled and frothy)
- 1 tablespoon honey or agave nectar (optional, depending on the sweetness of the fruit)
- Fresh mint sprigs or orange wheels for garnish
Step-by-Step Instructions
1. The first step in learning how to make orange juice with blender technology is selecting and preparing your fruit. Begin by thoroughly washing your oranges under cool running water. Even though you will be removing the peel, washing the exterior prevents any surface dirt or pesticides from transferring to the fruit flesh during the cutting process. Once cleaned, pat them dry with a kitchen towel. For the best flavor, choose oranges that feel heavy for their size, as this weight indicates a high juice content. If your oranges have been in the refrigerator, let them sit at room temperature for a few minutes; warmer fruit often releases its liquid more easily than cold fruit.
2. Now it is time to peel the fruit. Using a sharp knife, slice off the top and bottom ends of each orange so they can sit flat on your cutting board. Carefully slide your knife downward following the curve of the fruit to remove the skin. It is essential to remove as much of the white pith as possible. While the pith contains beneficial fiber, it also carries a distinct bitterness that can overpower the sweetness of your juice if too much is left behind. Once the peel is gone, break the orange into segments or cut it into large chunks. If you are using oranges with seeds, such as Valencia, take a moment to pop the seeds out with the tip of your knife to ensure your final drink is perfectly smooth.
3. Place your prepared orange segments directly into the blender jar. At this stage, you should also add your liquid base. Start with a half-cup of cold filtered water. The water helps the blender blades catch the fruit segments and creates a vortex, ensuring that every piece of fruit is pulverized evenly. If you prefer a very thick, nectar-like consistency, you can reduce the water, but adding a little bit of liquid is necessary to prevent the motor from straining. If you want a beverage that is exceptionally hydrating, you might even consider using coconut water as your base liquid instead of plain water.
4. Add your ice cubes to the blender jar. Using ice serves two purposes: it makes the juice instantly chilled and refreshing, and it helps to break down the cellular structure of the orange more efficiently, resulting in a frothy, aerated texture. If you have a high-speed blender, the ice will be pulverized into the liquid within seconds. If you are using a standard household blender, you may want to crush the ice slightly before adding it to ensure a uniform consistency without any large frozen chunks remaining in the glass.
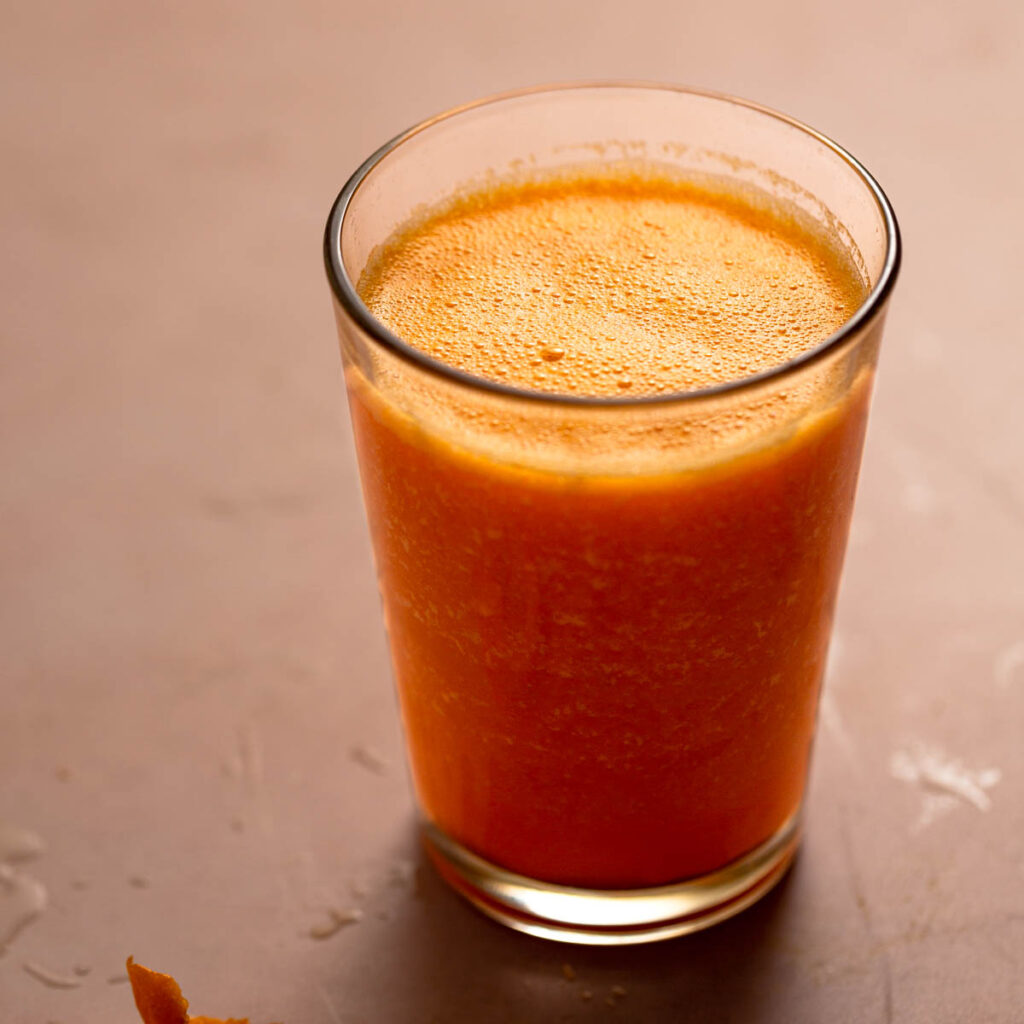
5. Secure the lid on your blender tightly. Start the machine on its lowest speed setting to begin breaking up the large chunks of fruit. Gradually increase the speed to high. You want to blend the mixture for approximately 45 to 60 seconds. During this time, the blades are not just cutting the fruit; they are emulsifying the natural oils from the citrus with the water and ice. You will notice the color transition from a deep orange to a bright, vibrant, almost creamy shade. This aeration makes blender-made juice feel much lighter on the palate than bottled versions.
6. Once the blending is complete, you have a choice to make regarding the pulp. If you enjoy a “whole food” style juice with all the fiber intact, you can pour the mixture directly into glasses. However, for a traditional, smooth juice experience, place a fine-mesh strainer or a nut milk bag over a large pitcher. Pour the blended liquid through the strainer. Use a silicone spatula or a large spoon to gently press the pulp against the mesh, extracting every last drop of flavorful liquid. This step ensures your drink is silky and professional in quality.
7. Taste your juice before serving. Depending on the season and the variety of orange used, the sweetness levels can vary significantly. If the juice tastes a bit too tart, stir in a teaspoon of honey or agave nectar until it reaches your desired flavor profile. Give it one final quick stir to ensure any added sweetener is fully incorporated. This is also the time to add a pinch of sea salt if you want to enhance the natural flavors and increase the hydrating properties of the drink.
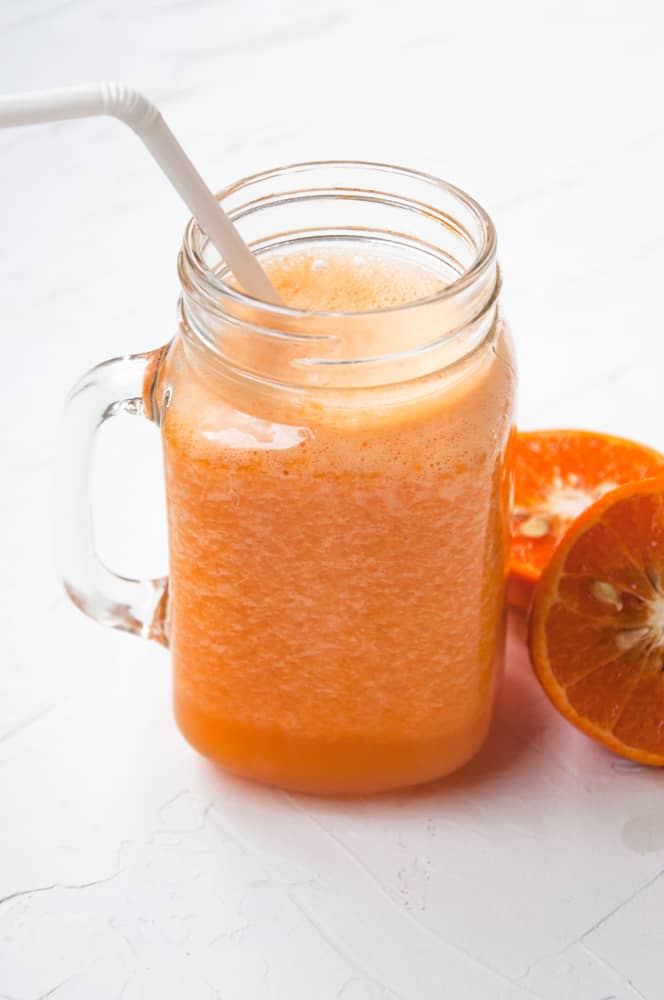
8. Prepare your serving glasses by filling them with a few fresh ice cubes if you prefer an extra-cold beverage. Pour the juice slowly into the glasses. To elevate the presentation, add a beautiful garnish to each glass. A thin wheel of orange placed on the rim or a sprig of fresh mint tucked into the top adds a wonderful aromatic component. Serve immediately while the juice is still frothy and perfectly chilled for the ultimate flavor experience.
To get the most juice out of your oranges, roll them firmly on the counter with the palm of your hand for 10 seconds before peeling; this breaks the internal membranes. For a truly professional finish, if you find your juice has too much foam on top after blending, simply let it sit for two minutes or skim the top with a spoon. If you have leftovers, pour them into an ice cube tray and use the frozen cubes for smoothies later in the week.
Variations & Substitutions
One of the best things about making juice at home is the ability to customize the flavor profile to suit your personal preferences or dietary needs. For a tropical twist, substitute half of the oranges with fresh pineapple or mango chunks; the blender will handle these fibrous fruits easily. If you want to boost the nutritional value and make the drink more hydrating, try adding a half-inch of fresh ginger or a teaspoon of turmeric powder for an anti-inflammatory kick. For those following a strictly low-sugar diet, you can blend the oranges with a handful of spinach or kale; the citrus does a wonderful job of masking the earthy flavor of the greens. If you don’t have fresh oranges on hand, you can use frozen orange segments, though you may need to add more water to help the blender process the frozen fruit into a drinkable consistency.
Storage & Make Ahead
Freshly blended orange juice is best enjoyed immediately to take advantage of the peak vitamin C content and the refreshing, frothy texture. However, if you have leftovers, you can store them in an airtight glass jar or carafe in the refrigerator for up to 48 hours. Because this is a natural product without emulsifiers, some separation is normal; simply give the jar a vigorous shake before pouring. For a long-term storage solution, you can freeze the juice in silicone molds. These frozen orange discs are perfect for dropping into water bottles for a slow-release citrus flavor throughout the day or for blending into future smoothies without needing extra ice.
Nutrition Information (Per Serving)
Calories: 115 kcal
Vitamin C: 120% DV
Potassium: 450 mg
Fiber: 3g (if pulp is retained)
Note: Nutritional values are estimates based on standard orange sizes and the inclusion of some pulp.
❓ Frequently Asked Questions
1
How long does orange juice last in fridge?
Freshly blended orange juice is best enjoyed immediately for maximum vitamin C, but it can be stored in an airtight glass container for up to 48 hours. Because it lacks preservatives, the juice may separate naturally over time, so give it a quick stir or shake before serving.
2
Can I make orange juice ahead of time?
Yes, you can prepare this juice up to a day in advance. To keep it tasting fresh, fill the container to the top to minimize air exposure and keep it chilled. If you are serving guests, add the ice and garnish just before presenting to ensure it stays cold.
3
What can I substitute for fresh oranges?
If oranges aren’t available, you can substitute with tangerines, clementines, or blood oranges for a similar citrus profile. Each variety offers a unique sweetness level, so you may need to adjust the amount of added sweetener or water depending on the juiciness and acidity of the fruit you choose.
4
How do I know when orange juice is done?
The juice is ready for straining once the mixture looks completely liquid and vibrant in color without large chunks of fruit visible. After passing it through a fine-mesh sieve or nut milk bag, the resulting liquid should be smooth, light, and free of any thick fibrous pulp.
5
Can I freeze orange juice?
You can definitely freeze homemade orange juice. Pour the juice into ice cube trays for a quick addition to smoothies, or freeze in freezer-safe containers for up to three months. Leave some headspace at the top of the container as the liquid will expand when it turns to ice.