Sea Salt Hair Spray DIY: Easy Homemade Texturizer
Imagine walking onto the warm sand, feeling the sun on your skin, and noticing that perfect, effortless texture in your hair that only the salty ocean breeze can provide. This sea salt hair spray diy recipe is your secret weapon for capturing that iconic, beachy look without having to step foot near the coast or spend a fortune on high-end salon products. What makes this particular mixture special is the delicate balance between texture-building minerals and deep-conditioning agents, ensuring your hair achieves that coveted matte finish without becoming brittle or dry. It is a total game-changer for anyone who loves a low-maintenance, bohemian aesthetic but wants to keep their strands healthy and hydrated.

- ⏱️ Prep Time: 5 minutes
- 🍳 Cook Time: 0 minutes
- 👥 Servings: 1 bottle
- 📊 Difficulty: Easy
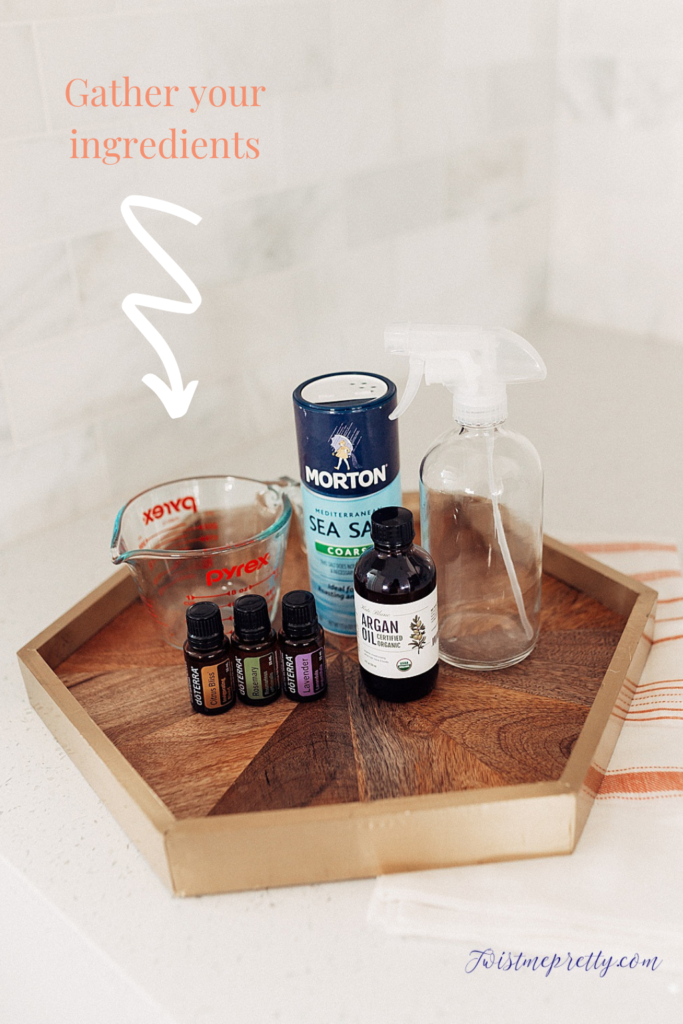
Ingredients
To create the perfect sea salt hair spray diy, you will need to gather a few key ingredients. These items are chosen specifically to mimic the ocean’s effects while providing a protective barrier for your hair cuticles.
The Texture Base
- 1 cup Distilled Water (warmed to help dissolve the solids)
- 1 tablespoon Fine Ground Sea Salt (for that classic beach grit)
- 1 tablespoon Epsom Salt (provides volume and magnesium benefits)
The Hydration Elements
- 1 tablespoon Organic Aloe Vera Gel (acts as a natural humectant)
- 1 teaspoon Unrefined Coconut Oil or Argan Oil (for shine and softness)
- 1/2 teaspoon Vegetable Glycerin (optional, for extra moisture retention)
The Sensory Finish
- 5-10 drops Lavender Essential Oil (for a calming, spa-like scent)
- 3 drops Lemon or Grapefruit Essential Oil (for a bright, refreshing aroma)
Step-By-Step Instructions
Following these instructions carefully will ensure that your homemade recipe stays shelf-stable and performs just as well as—if not better than—the luxury brands. Since there is no actual cooking time involved, the process is incredibly fast, but the order of operations matters to achieve a smooth emulsion.
Step 1: Prepare Your Mixing Vessel
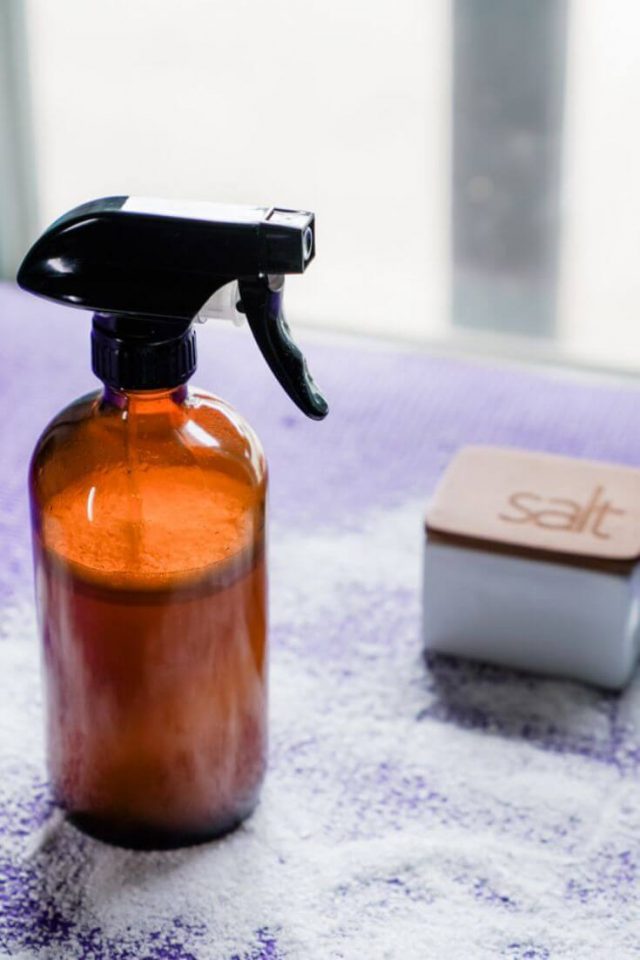
Begin by selecting a high-quality glass or BPA-free plastic spray bottle. Glass is often preferred when using essential oils to prevent any degradation of the plastic. Ensure the bottle is completely clean and dry before you start. Since the prep time is so short, having your bottle ready to go is the most efficient way to begin.
Step 2: Heat and Infuse the Water
While this is a no-cook recipe, you do want your distilled water to be warm. You do not need to bring it to a boil; a gentle simmer is plenty. Warm water is essential because it allows the sea salt and Epsom salt to dissolve completely. If the water is too cold, the salt crystals will remain whole, which can clog your spray nozzle and lead to uneven application on your hair. Pour the warm water into a glass measuring cup or a small bowl.
Step 3: Dissolve the Mineral Salts
Add your tablespoon of fine sea salt and your tablespoon of Epsom salt to the warm water. Use a whisk or a spoon to stir the mixture vigorously for about sixty seconds. You will notice the water go from cloudy to clear as the salts dissolve. Pro tip: Using fine-ground sea salt is much more effective than coarse salt for this specific recipe, as it integrates into the liquid much faster.
Step 4: Incorporate the Conditioning Oils
Once the salts are fully dissolved, it is time to add your fats. If you are using coconut oil and it is currently in a solid state, melt it briefly in the microwave for five seconds until it is liquid. Add the oil to the salt water along with the aloe vera gel. The aloe vera gel is the secret ingredient in this instructions list; it provides a light hold and prevents the salt from stripping too much moisture from your hair shafts.
Step 5: Emulsify the Mixture
Because oil and water naturally want to separate, you need to give the mixture a good whisking. Add the vegetable glycerin at this stage if you are using it. The glycerin acts as a bridge between the water and the oils, helping them stay blended for longer periods. Continue stirring until you see tiny droplets of oil evenly dispersed throughout the liquid.
Step 6: Scent and Customize
Now comes the fun part of the recipe. Add your drops of essential oils. Lavender and citrus are fantastic choices because they mask the slightly metallic scent of the salts and provide an aromatherapy experience every time you style your hair. If you want a more tropical vibe, you could even add a drop of coconut extract.
Step 7: The Transfer
Carefully pour the mixture from your bowl or measuring cup into your spray bottle. Using a small funnel can prevent spills and ensure you don’t lose any of your precious ingredients. Leave about an inch of headspace at the top of the bottle. This extra room is crucial because you will need to shake the bottle before every single use to redistribute the oils.
Step 8: The Final Shake and Test
Secure the spray nozzle tightly. Give the bottle a very vigorous shake for thirty seconds. To test the spray, mist a small amount into the air to check the nozzle’s consistency. Then, try a small spritz on the ends of your hair. If it feels too “crunchy,” you can add another teaspoon of water. If you want more texture, add a pinch more sea salt. Your custom sea salt hair spray diy is now ready for use!
To get the best results, always apply this spray to damp, towel-dried hair rather than bone-dry hair. Scrunch your hair upwards from the ends toward the roots to encourage natural wave formation. If you have very fine hair, focus the spray on the mid-lengths and ends to avoid weighing down your roots. Also, if your spray nozzle ever gets clogged by salt crystals, simply run the plastic tube under hot water for a minute to dissolve the blockage.
Variations & Substitutions
The beauty of a diy recipe is that it is completely customizable to your hair type and dietary preferences (for your hair!). If you are looking for a vegan alternative and want to avoid certain oils, you can swap coconut oil for jojoba oil, which closely mimics the natural oils produced by your scalp. For those with very dark hair who worry about the salt leaving a faint white residue, you can substitute the distilled water with brewed black tea; the tannins in the tea also add extra shine. If you find sea salt too drying, you can increase the ratio of Epsom salt, which is much gentler. You can also play with the fragrance by adding peppermint oil for a cooling scalp sensation or rosemary oil, which is widely known for supporting hair growth.
Storage & Make Ahead
Because this recipe contains water and organic matter like aloe vera, it is best used within two to three months. Storing the bottle in a cool, dark place, such as a bathroom cabinet or even the refrigerator during hot summer months, will help preserve the ingredients. Since the prep time is only five minutes, it is very easy to make a fresh batch whenever you run out. Always remember to give the bottle a quick shake before each application to ensure the oils and salts are perfectly blended for the best styling results.
- 🔥 Calories: 0 (This is for your hair, not your stomach!)
- ✨ Shine Factor: High
- 🌊 Texture Level: Beachy
- 🌿 Ingredients: 100% Natural
This formula is rich in magnesium from the Epsom salts and Vitamin E from the carrier oils, providing essential nutrients to your hair follicles while you style.
❓ Frequently Asked Questions
1
How long does sea salt hair spray last?
When stored in a cool, dark place, your homemade sea salt spray will typically last for two to four months. Since it uses distilled water and lacks commercial preservatives, it is best to check for any scent changes or cloudiness periodically to ensure the spray remains fresh and safe.
2
Can I use table salt instead of sea salt?
While you can technically use table salt, sea salt is highly recommended for this recipe. Sea salt contains minerals that provide better texture and a more authentic beachy feel. Table salt is more processed and can be more drying to your hair without providing the same level of volume.
3
What can I substitute for coconut oil?
If coconut oil is too heavy or you dislike the scent, you can easily substitute it with argan oil, jojoba oil, or sweet almond oil. These oils provide necessary moisture to counteract the drying effects of the salt while remaining lightweight enough to maintain hair volume and texture.
4
How do I know when the spray is mixed properly?
You will know the mixture is ready when the water is clear and no salt crystals are visible at the bottom of the container. Using warm distilled water is the most effective way to ensure all ingredients, especially the salt and oils, emulsify and blend together smoothly.
5
Can I use this on dry hair?
Yes, you can use this spray on dry hair to refresh your style and add texture. Simply mist it lightly over your hair and scrunch with your hands. However, for the most defined waves, it is usually best to apply the spray to damp, towel-dried hair first.